Git Saver with GitLab

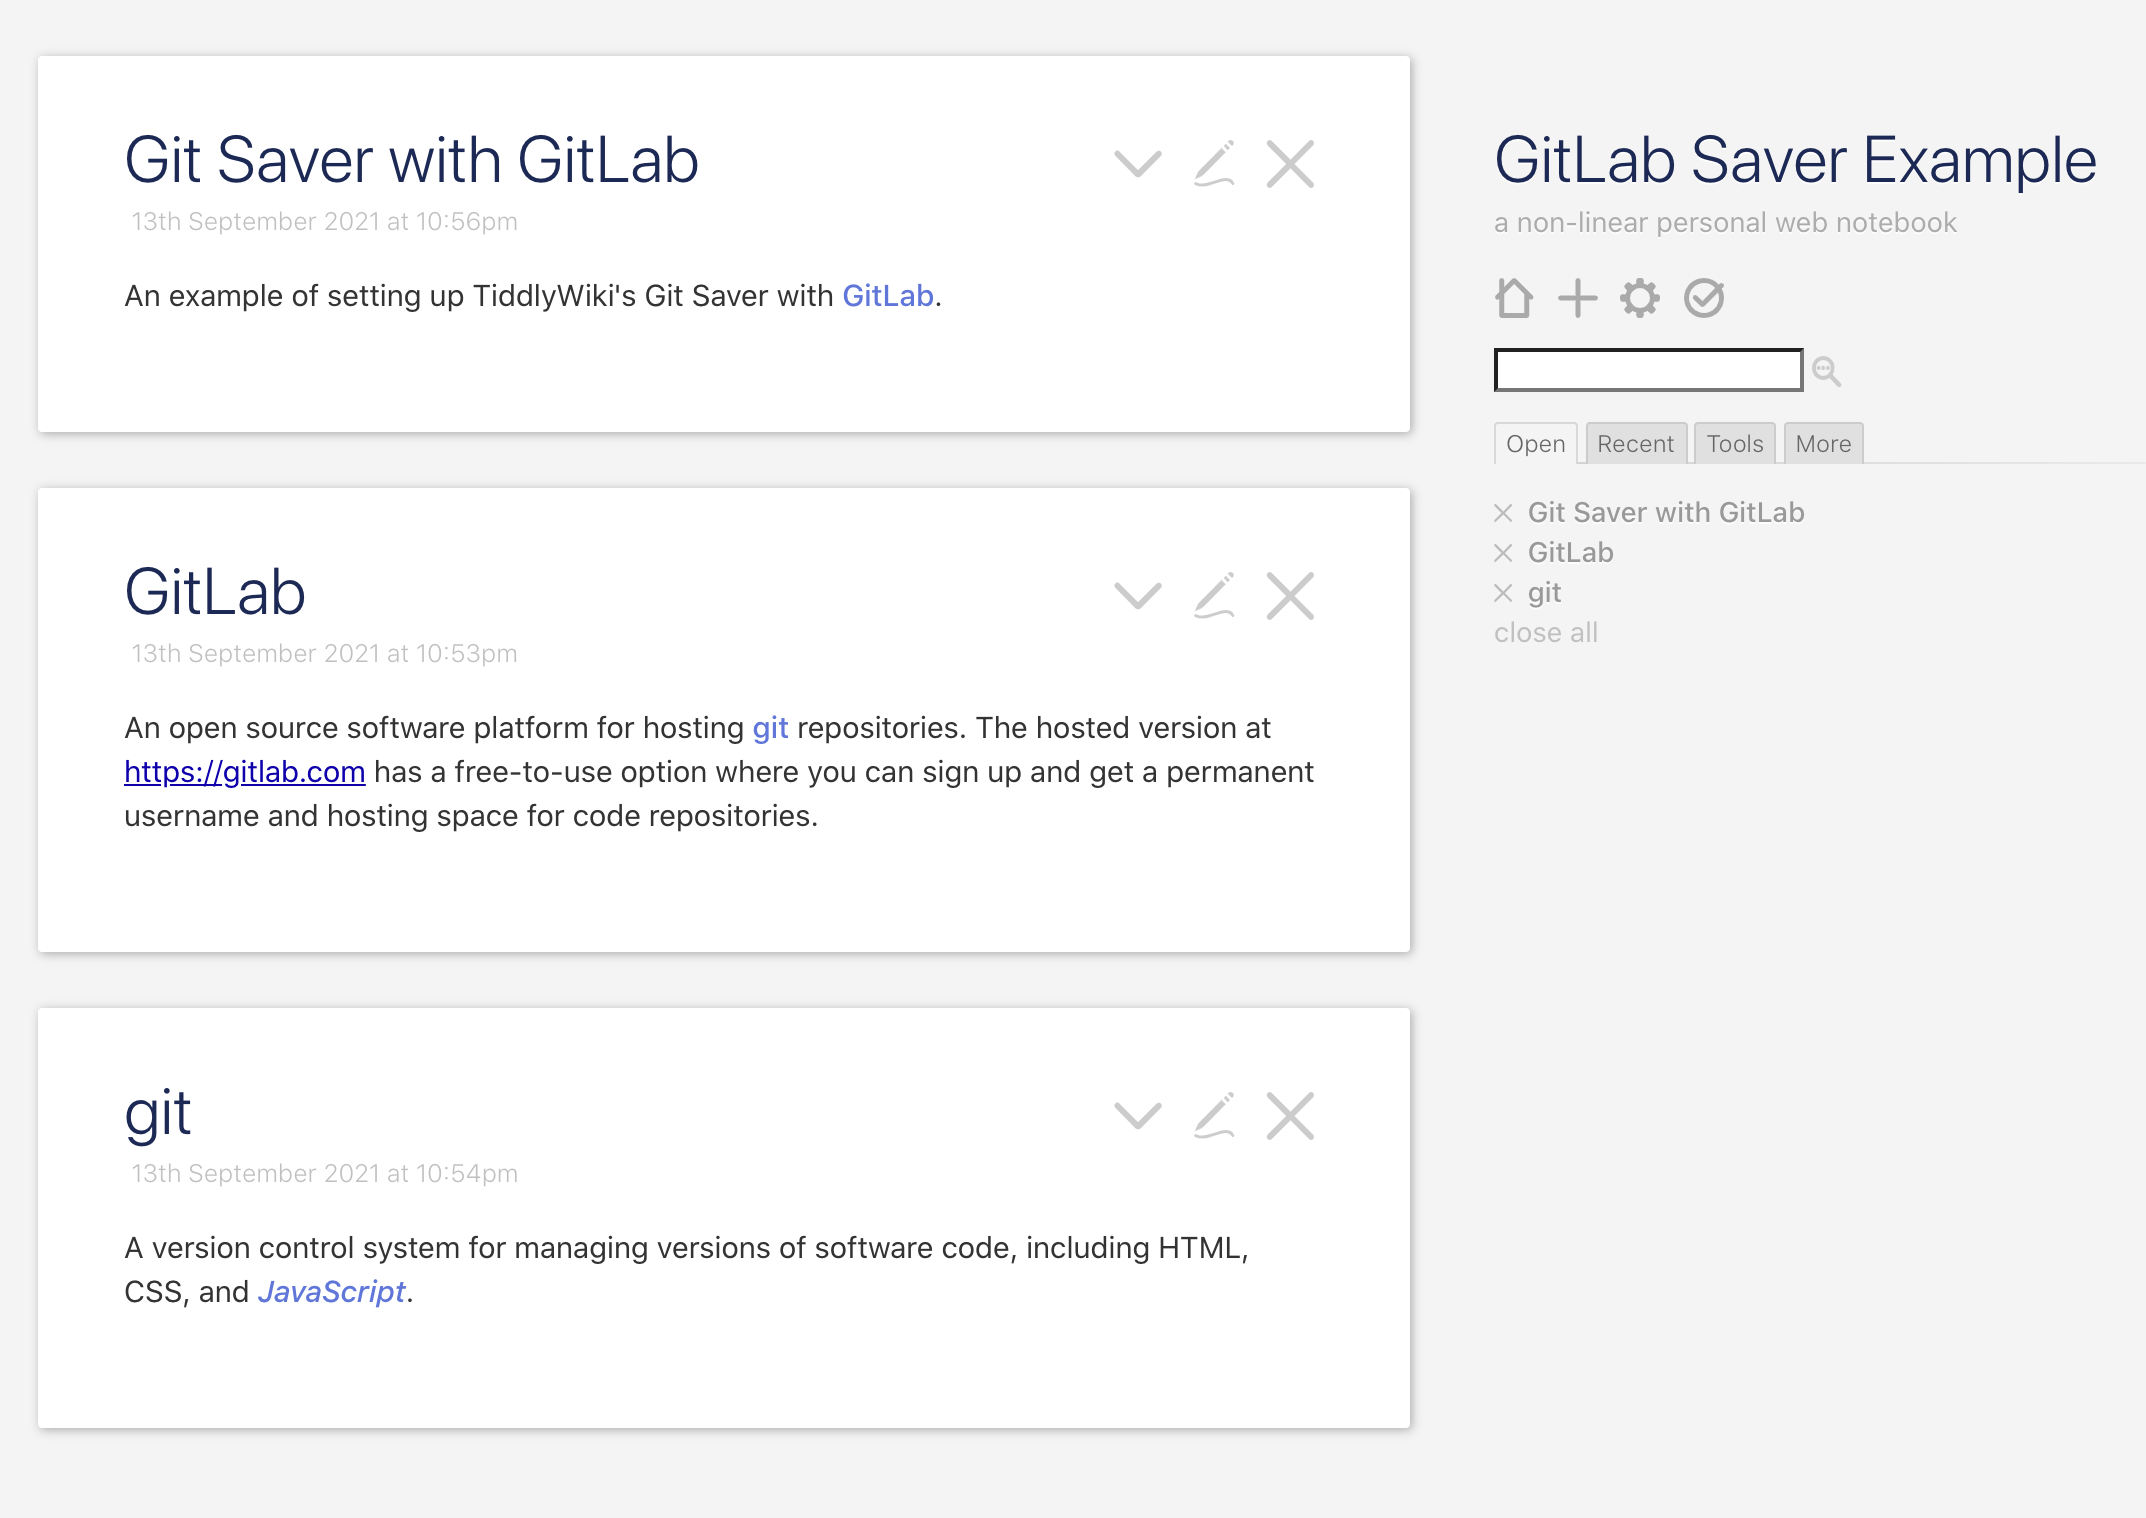
This is a HowTo wiki write up in response to @BlueSoul’s question:

Getting Started with TiddlyWiki

I went to tiddlywiki.com and clicked on “Download empty” to get an empty.html on my desktop, which I opened locally as a file.

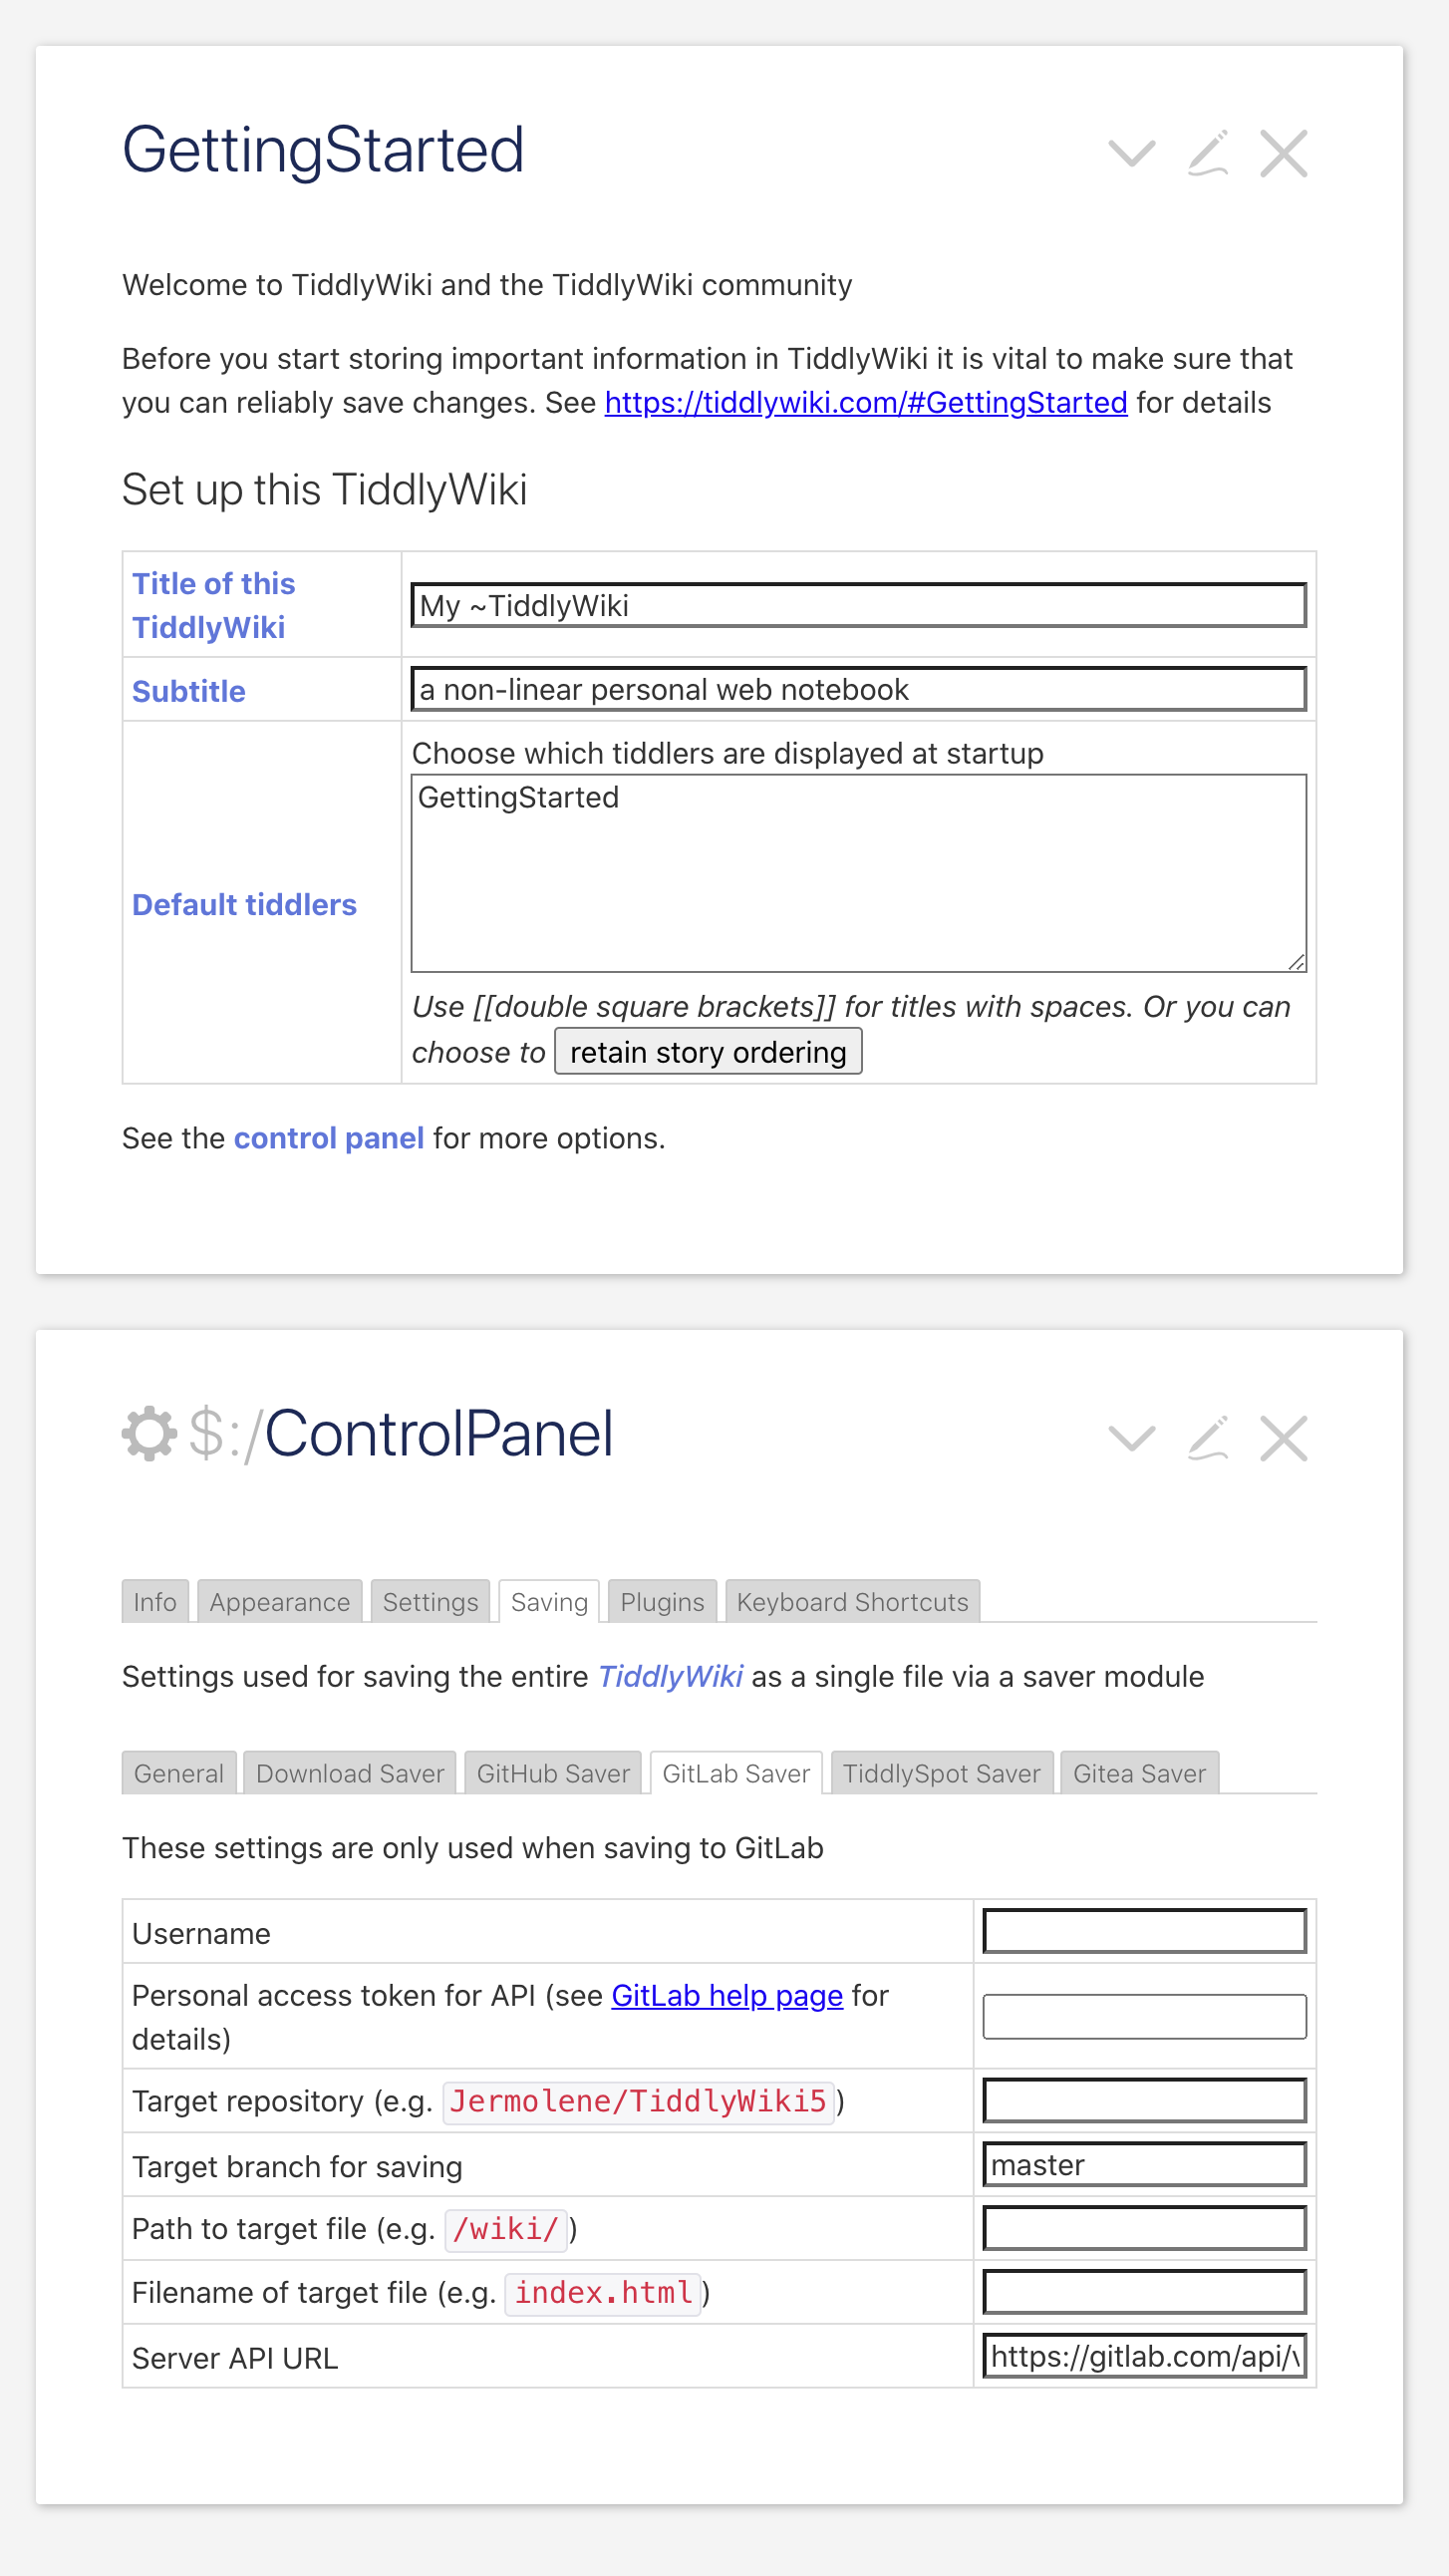
I clicked on Control Panel and then the Saving tab, and then into the GitLab Saver tab.

I then went over to https://gitlab.com and signed into my borismann existing account. To create a new account, there is a “get free trial” that is a frankly confusing series of pages to go through. Yes, you can create “free forever” GitLab accounts, if you persevere.

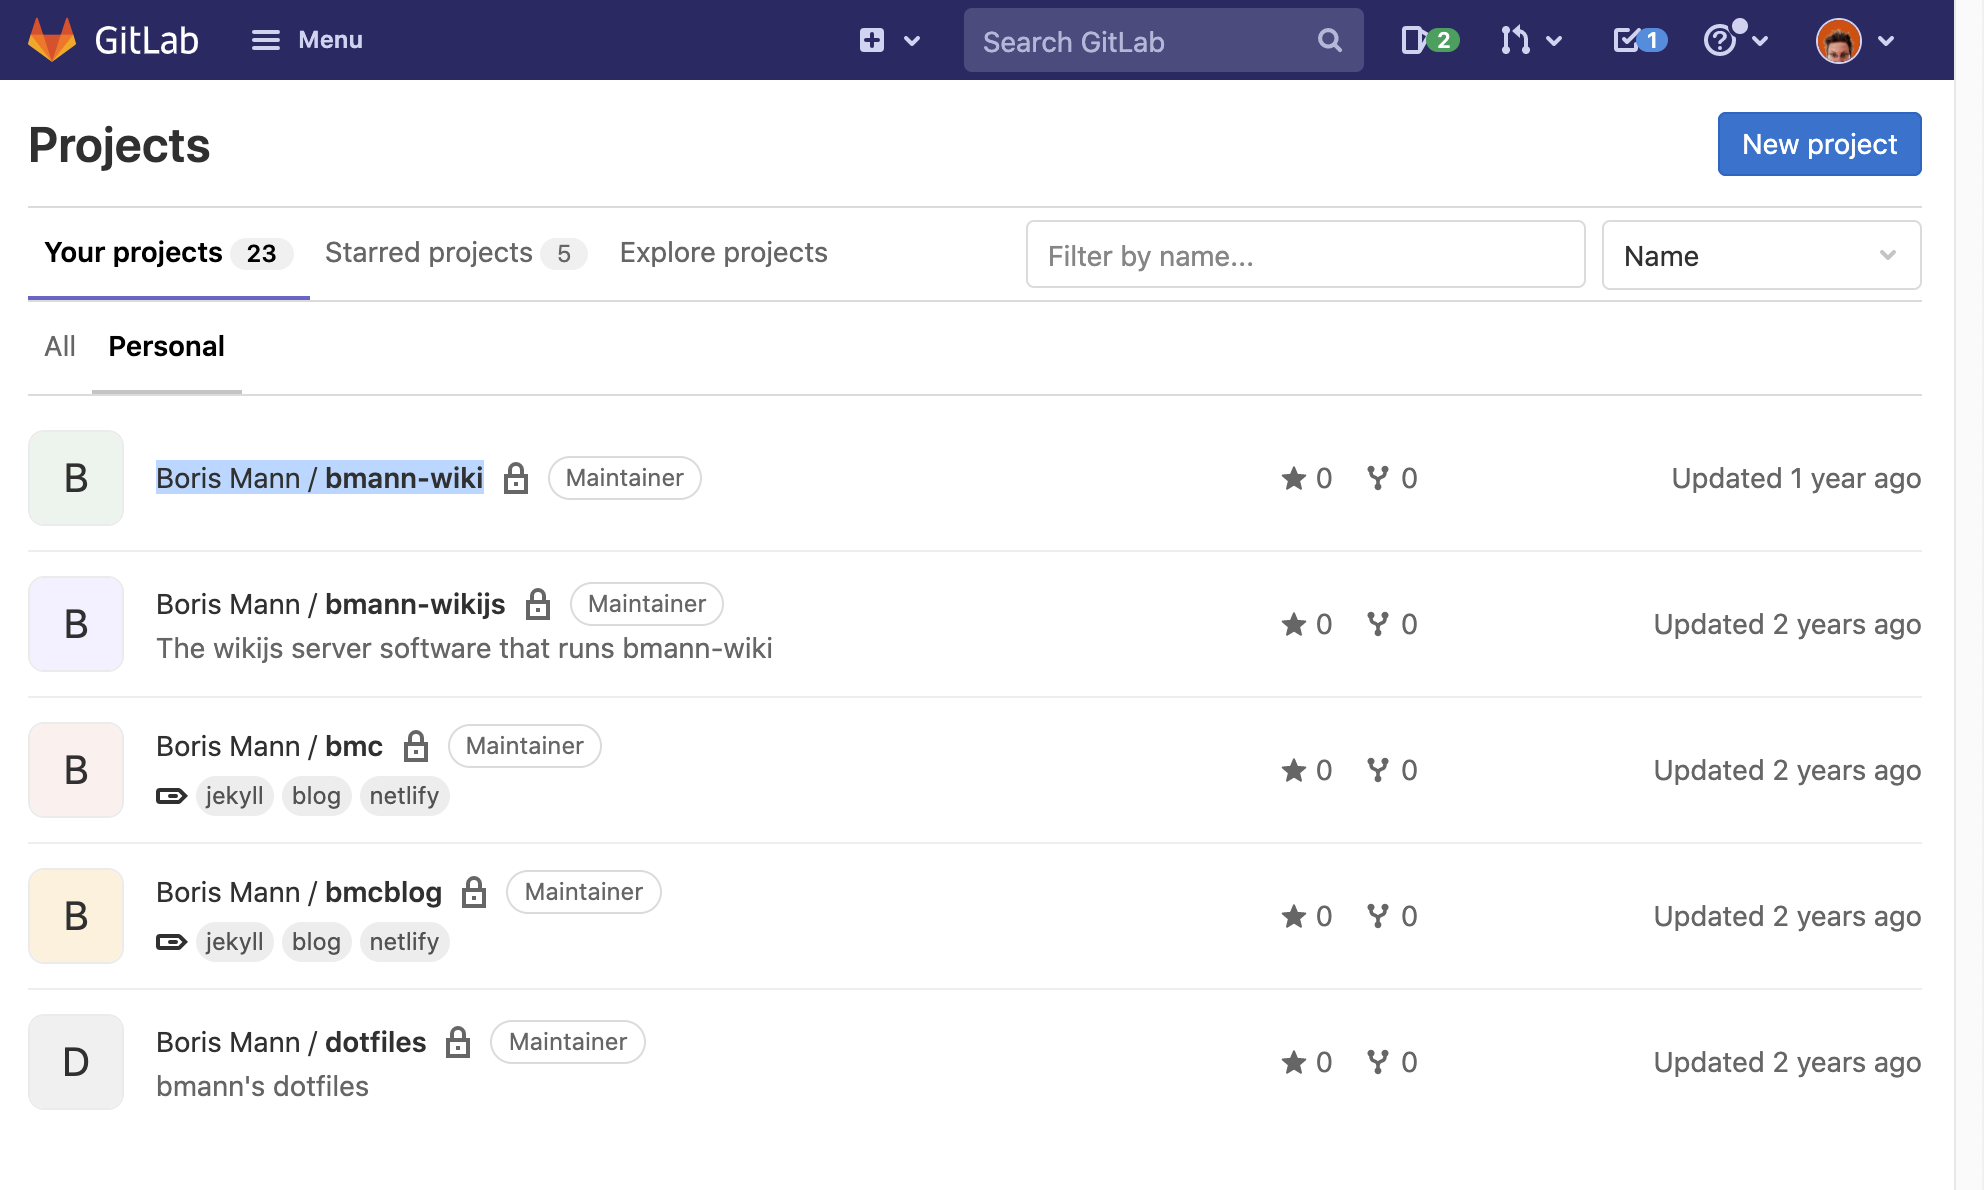
I have a handful of personal repositories (or “repos”) on GitLab.

Create a new project on GitLab

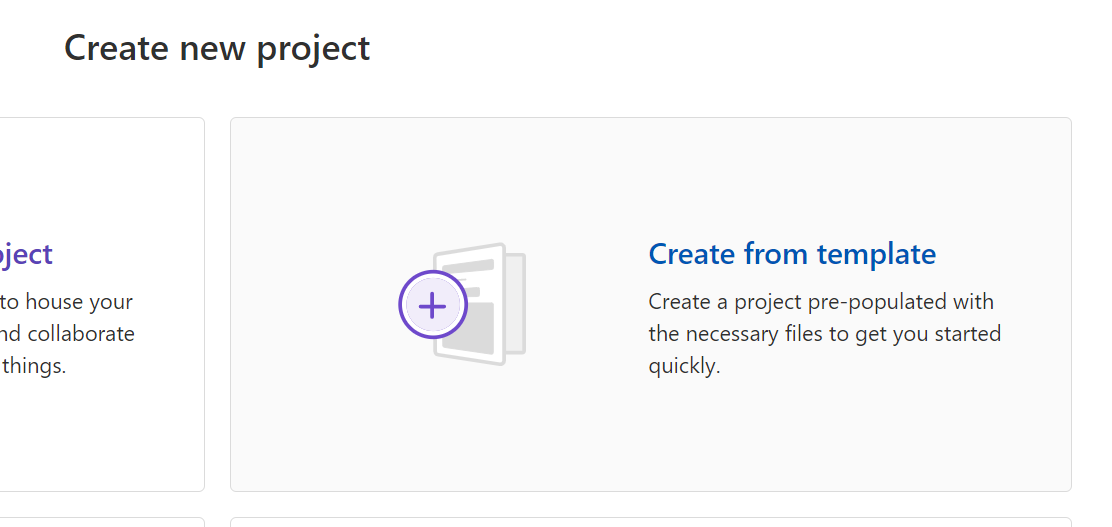
I’m going to hit the New Project button and see this screen:

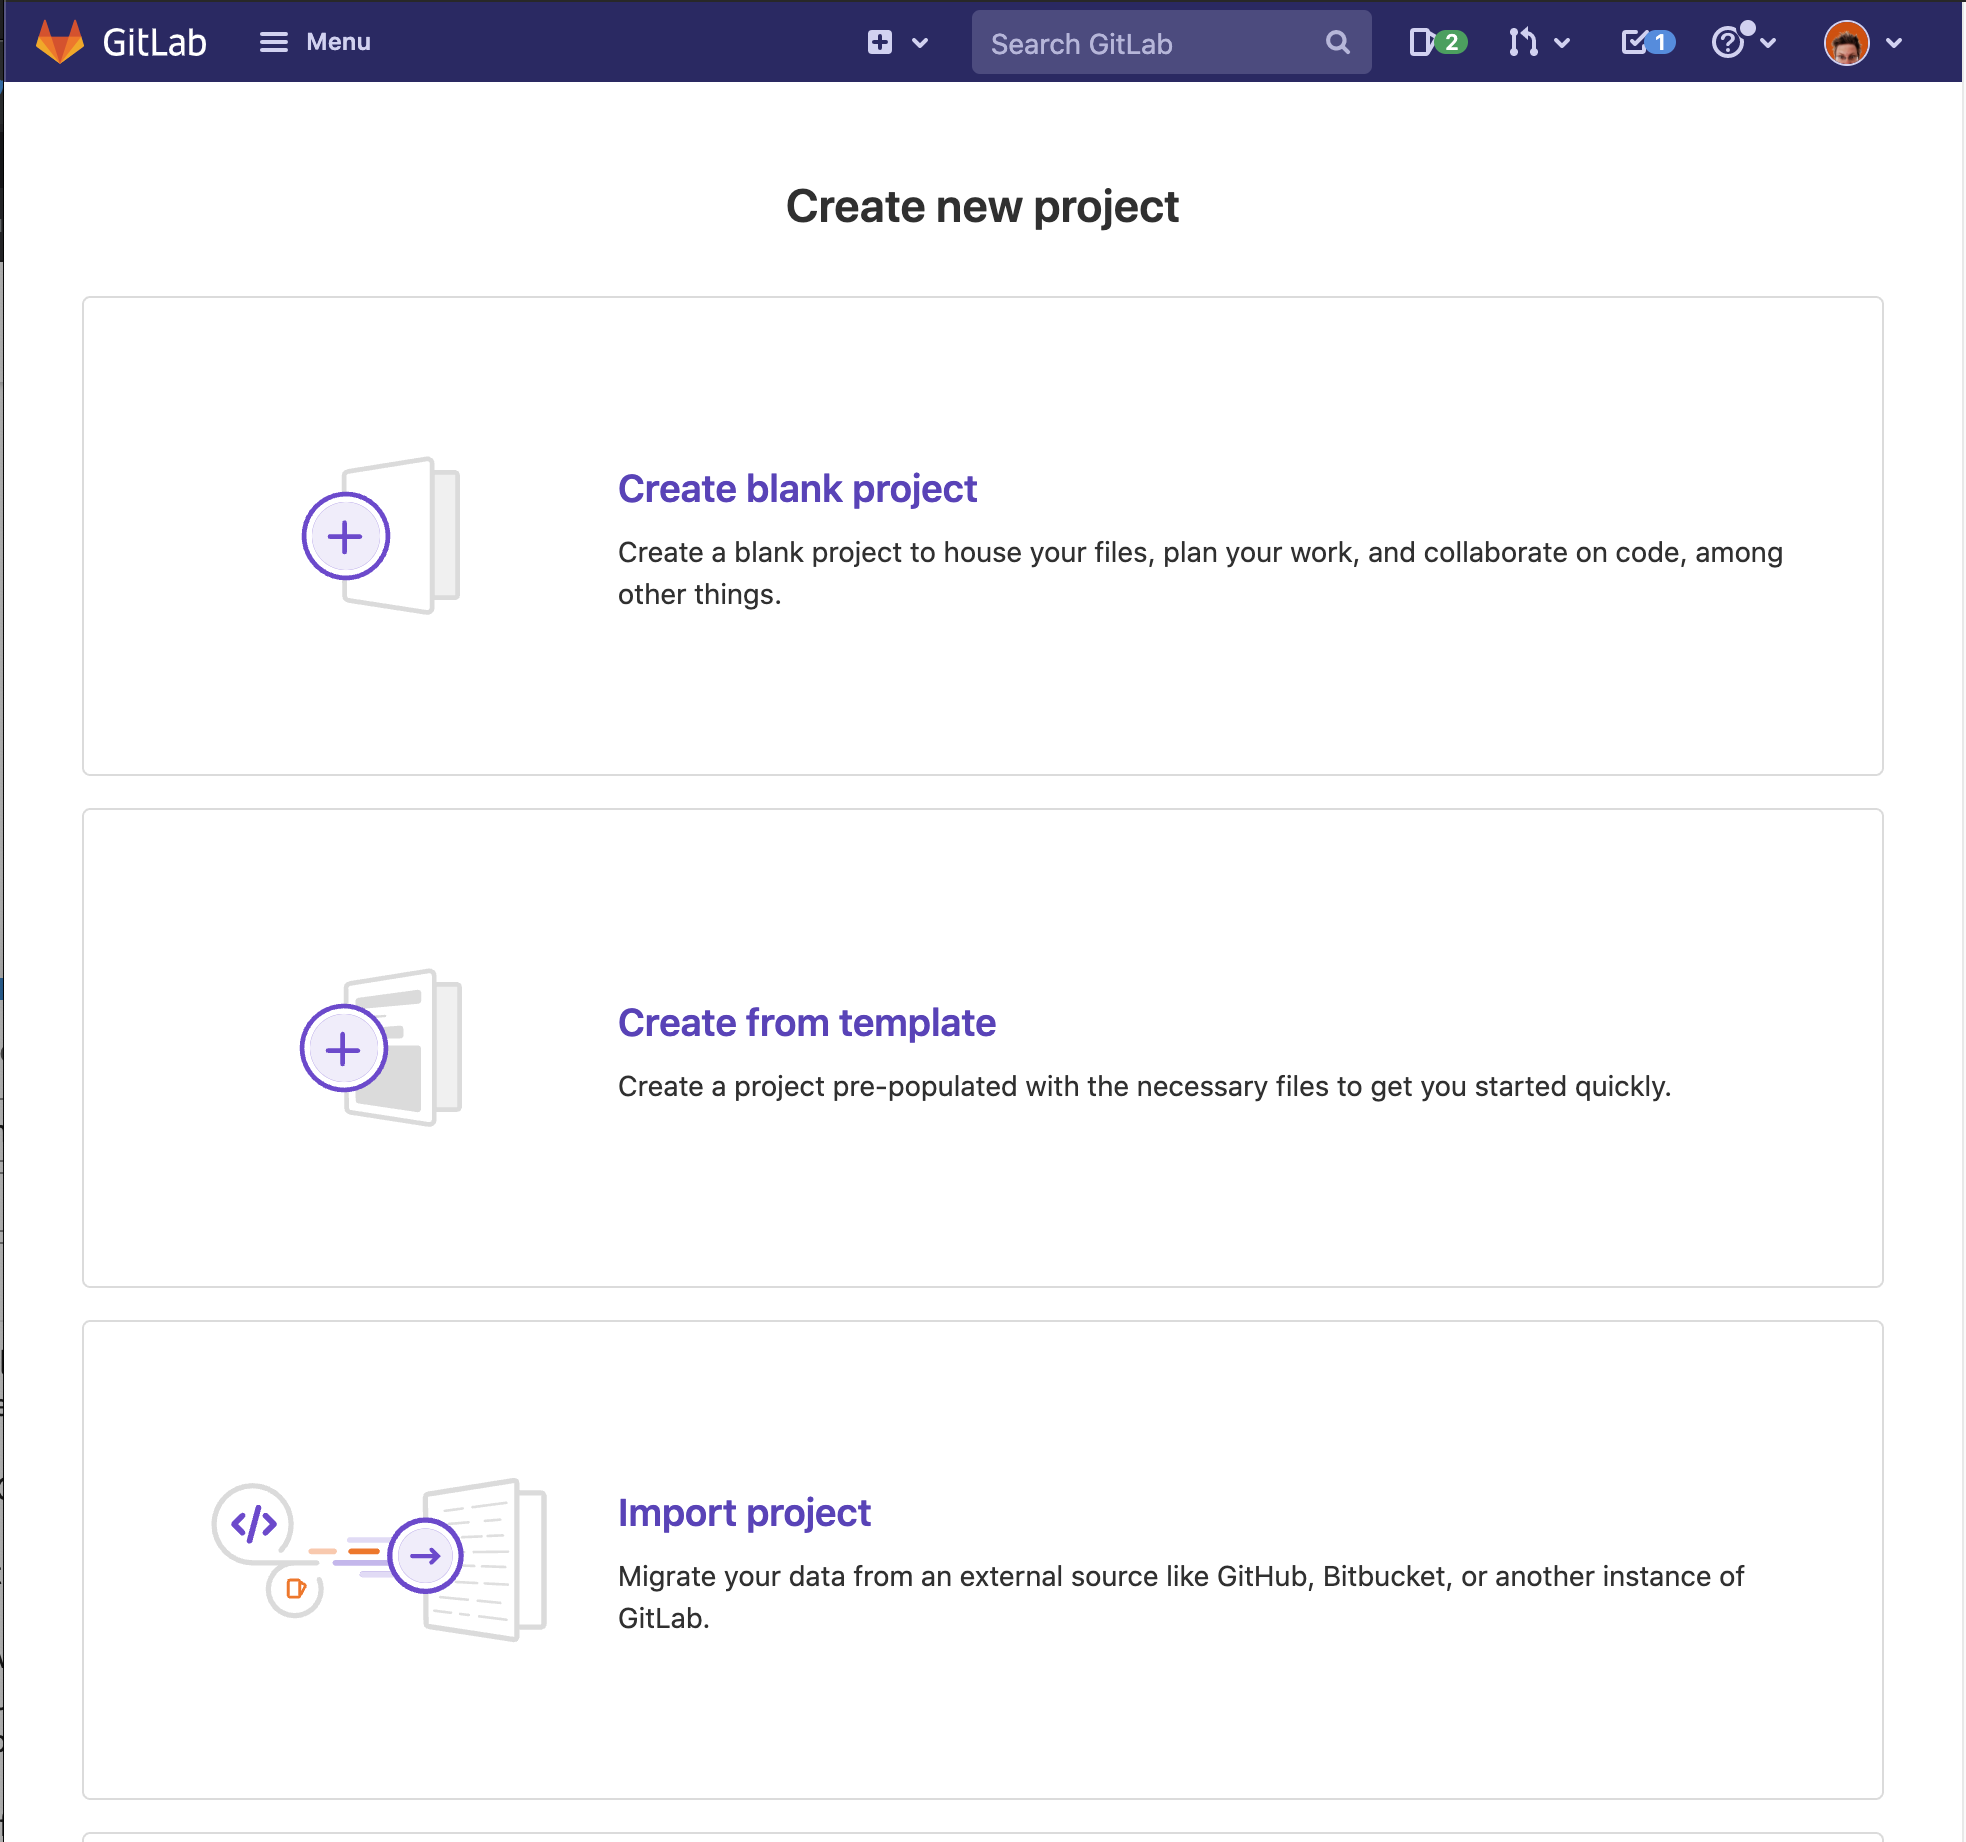
Templates on GitLab (as opposed to a GitHub template, which anyone can create) are for particular kinds of code projects. The GitLab Pages / Plain HTML looks promising, but we’re trying to setup a saver here, not do publishing.

So I’ll pick the blank project option.

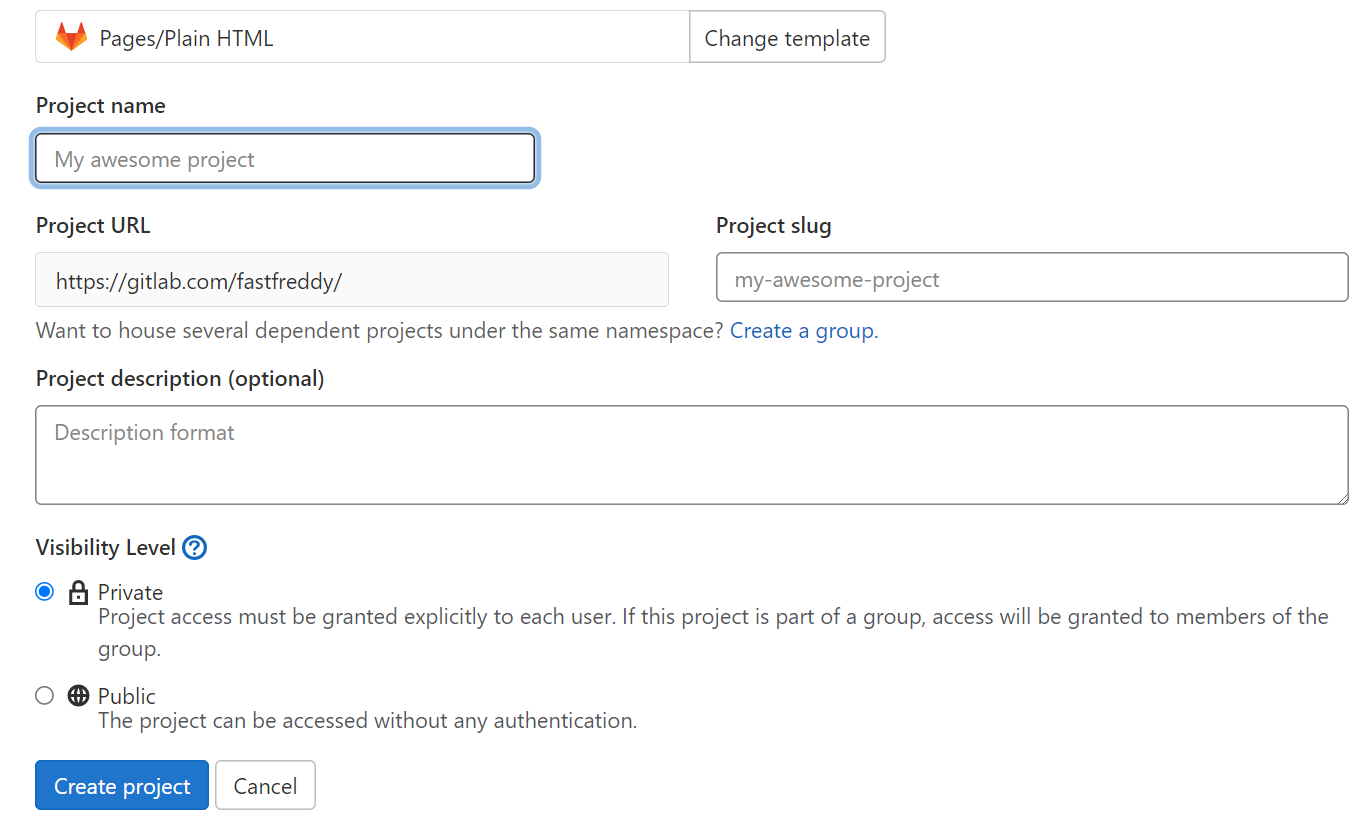
I’ll make it public, and I will check the box for :white_check_mark: Initialize repository with a README

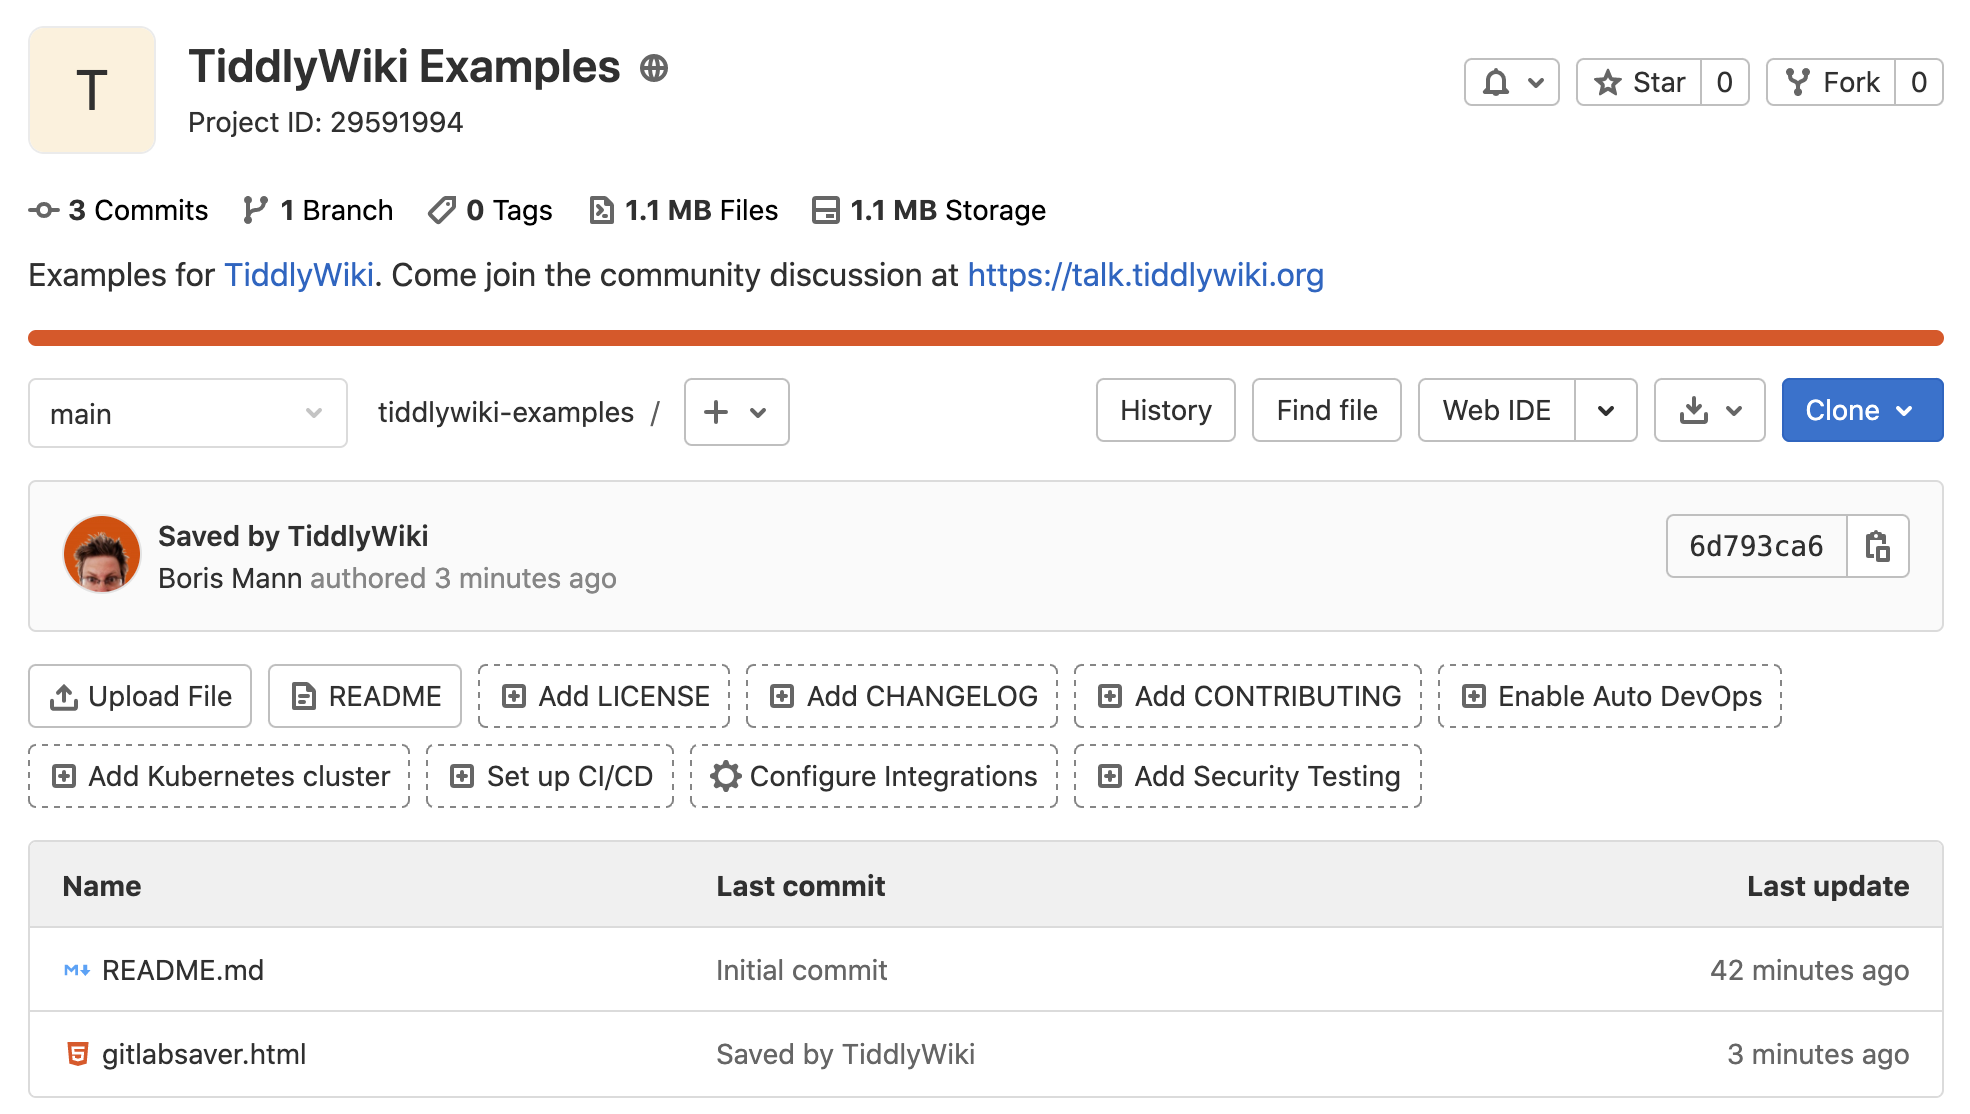
This is available at https://gitlab.com/borismann/tiddlywiki-examples

No, it’s not just you, this page is amazingly visually and informationally dense, complex, and confusing. And that’s AFTER I closed three different notification boxes in this page.

One thing to note, the default branches on both Github and Gitlab are now called “main”. The Git savers in TW 5.1.23 still default to “master”. TODO: check pre-release, make a PR to fix this for the 5.2.0 release.

Upload an initial wiki file

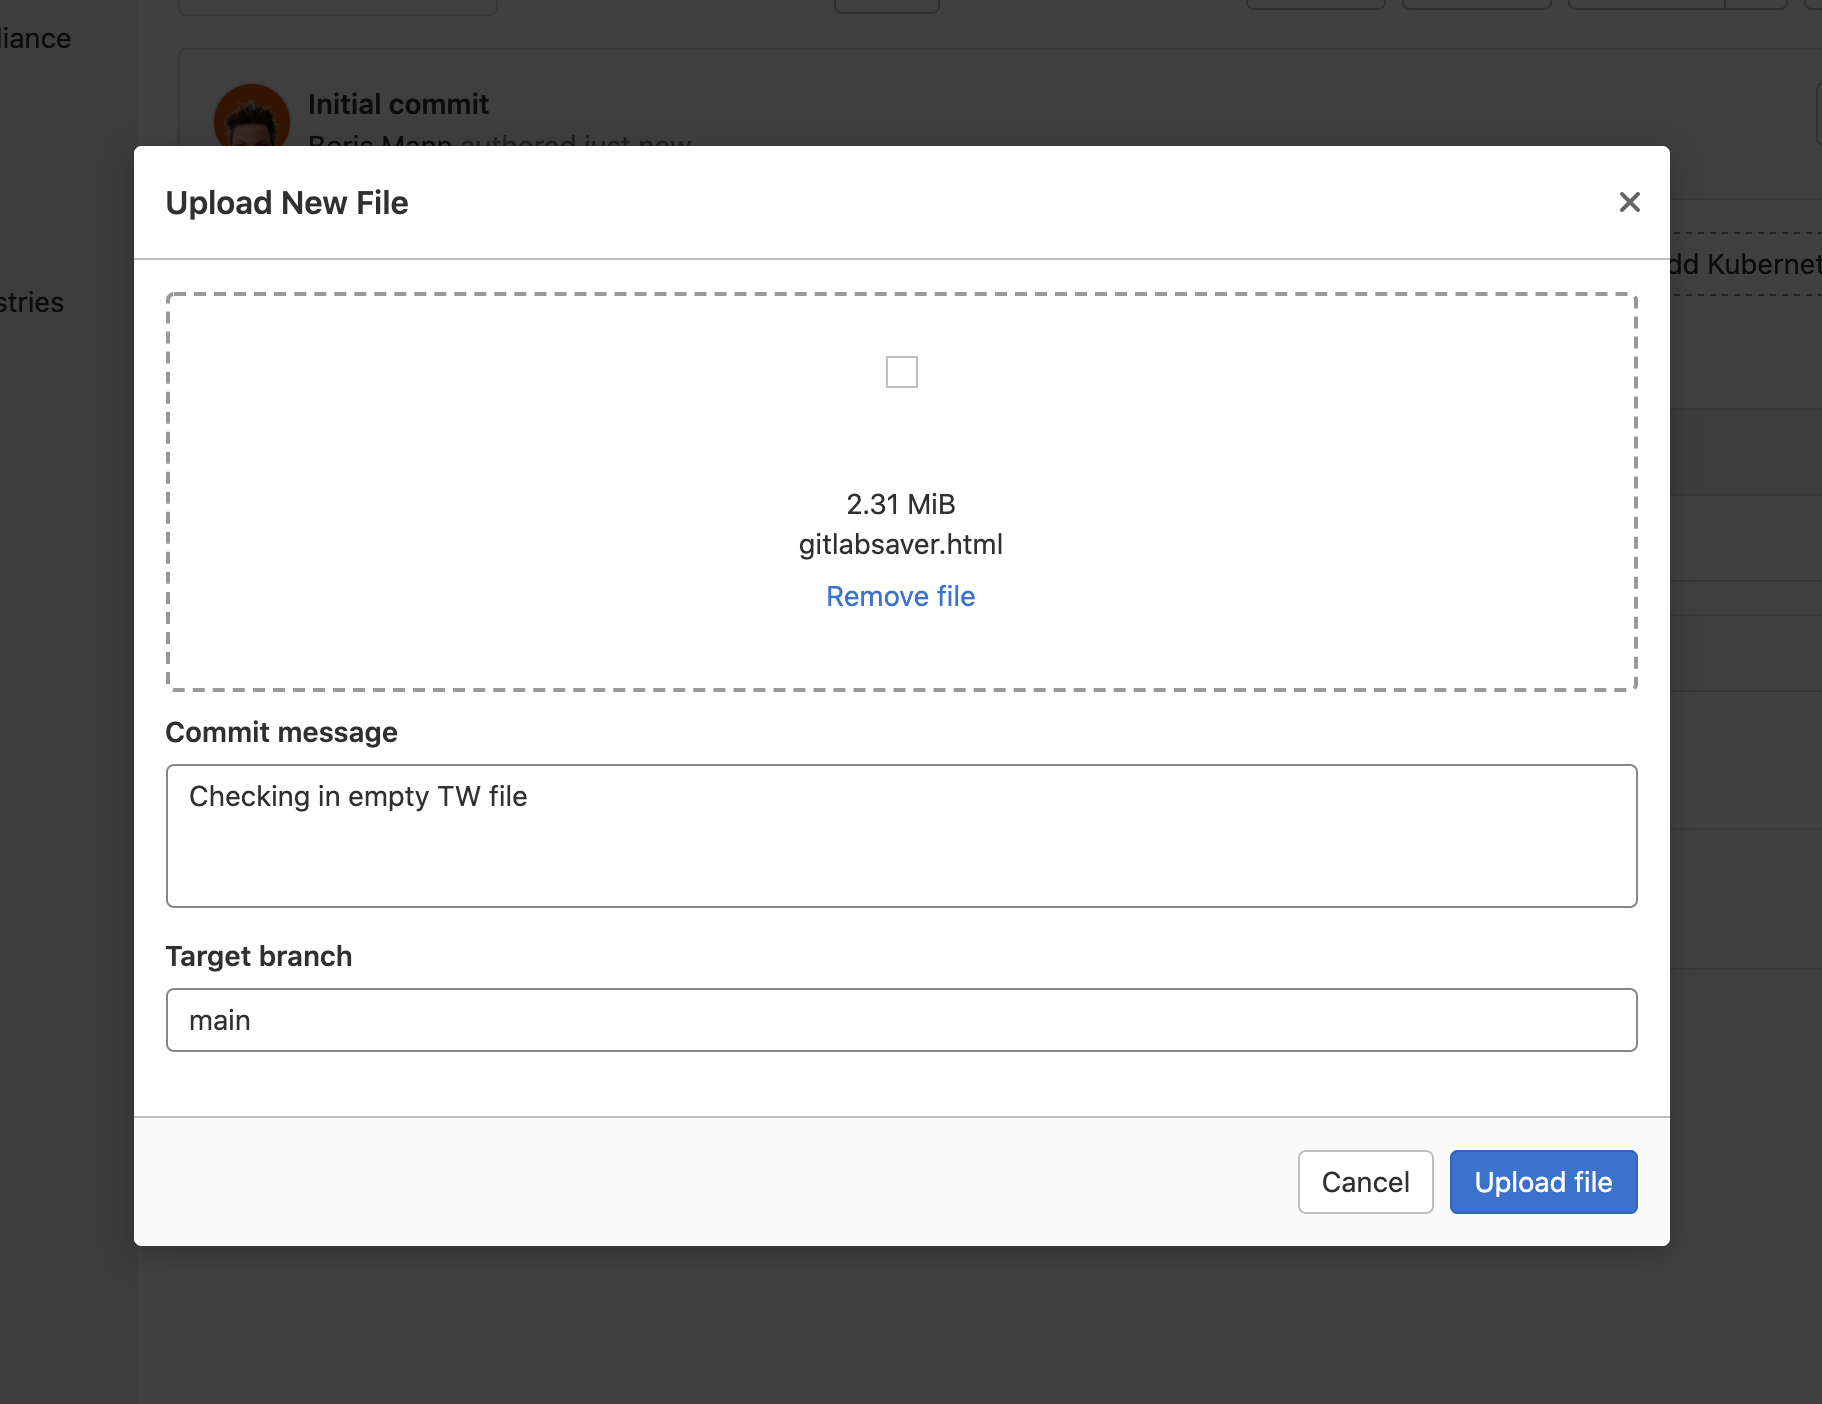
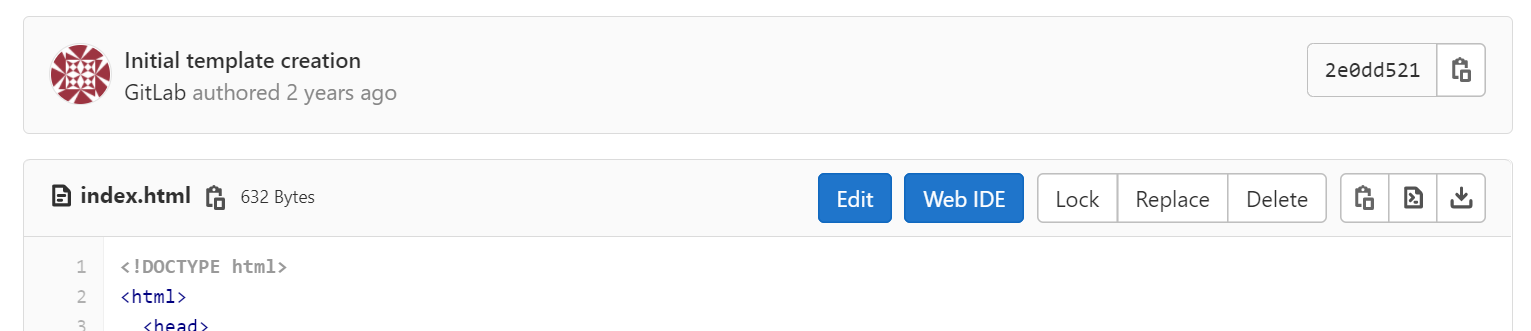
Click on the “Upload File” button and you’ll got a modal display. Drag and drag didn’t work for me, so I clicked upload and selected the file, and made a commit message. I renamed empty.html to gitlabsaver.html.

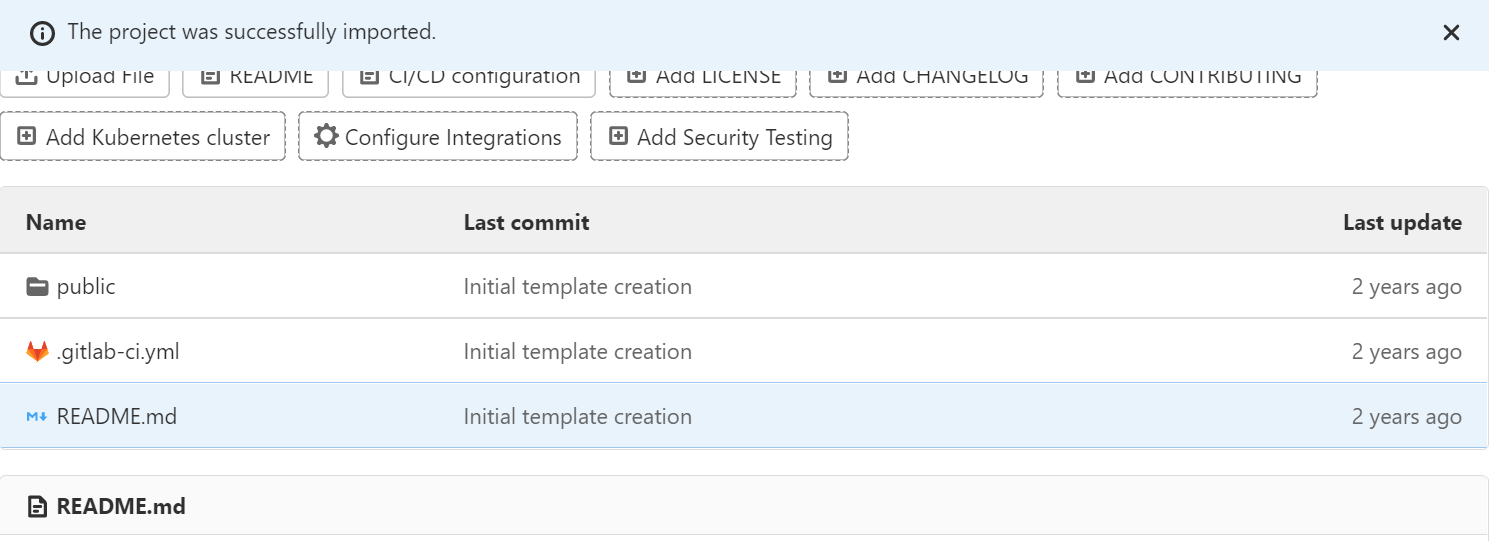
You should get a success message on a page that looks like this:

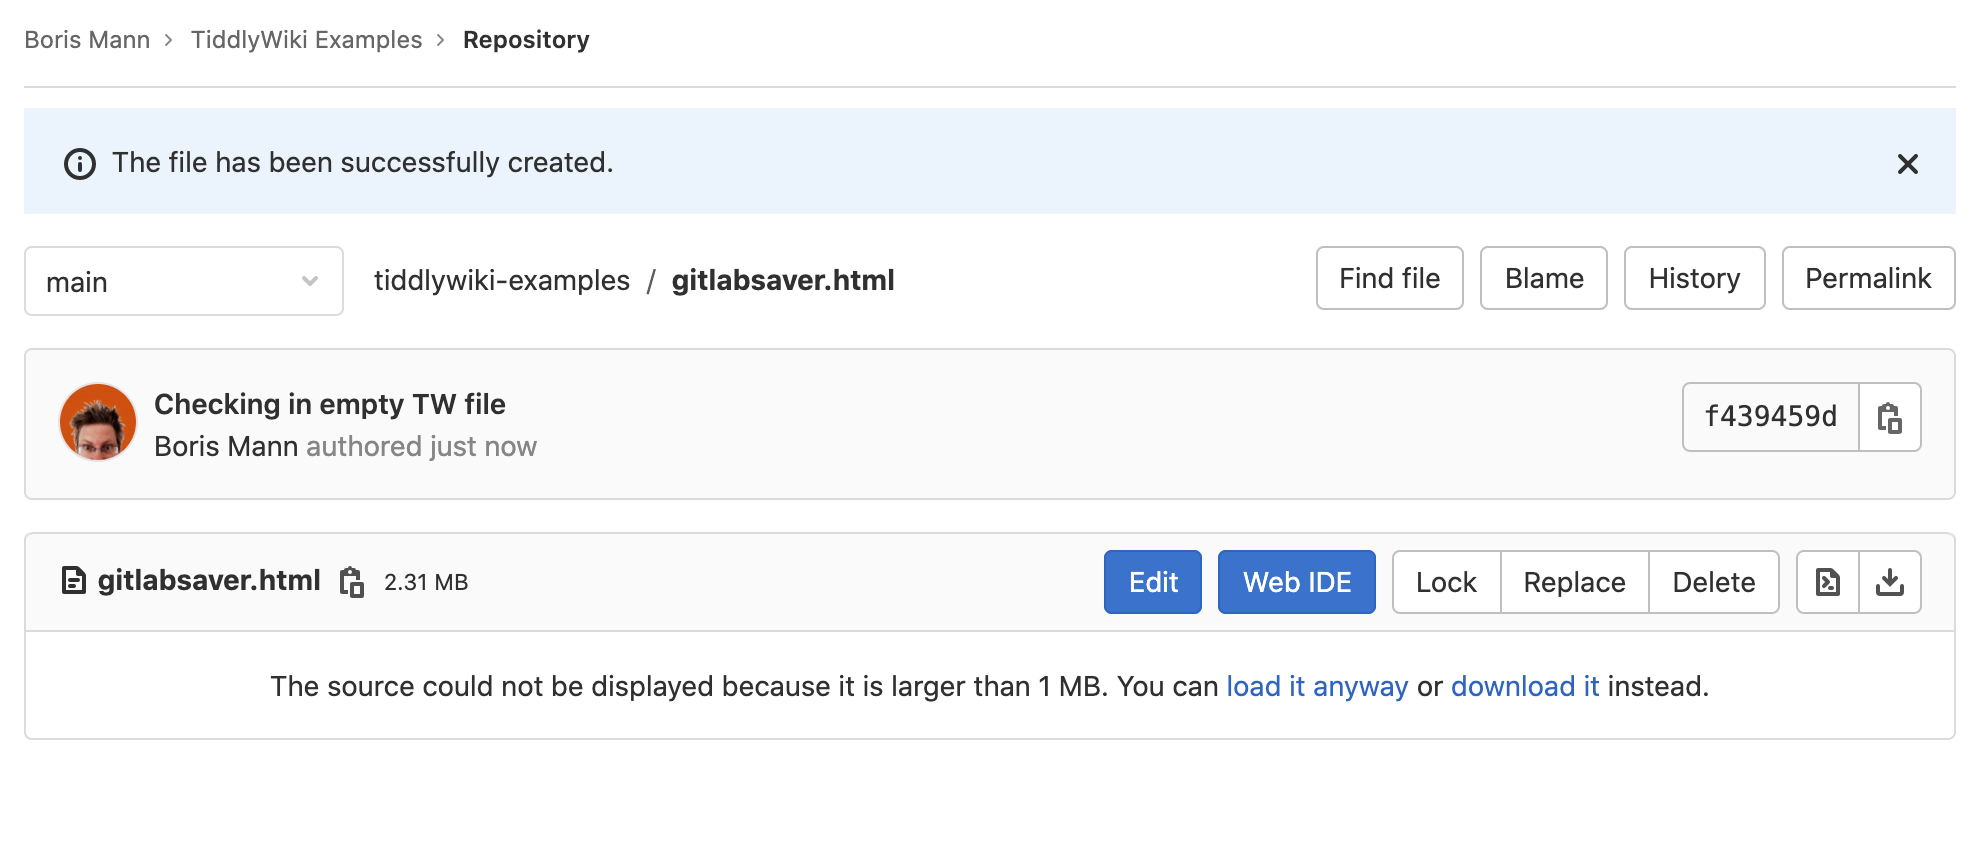
Now we’ve got a fresh, empty wiki uploaded (or rather “committed” or “checkedin”) to our GitLab project repository.

Setting up a Personal Access Token for GitLab

The second item we need to fill out in the GitLab is an access token, which has a link to the Gitlab personal access tokens documentation page. The description isn’t very non-developer friendly on that page. In short, it’s a special code (or token) that grants you access to remotely working with the GitLab service, without using your password.

They can be created, deactivated, have different levels of permissions, and so on, in a way that is much safer than flinging a password around everywhere.

Generally, you want to create a separate access token for every app. It’s probably OK to share one access token across a number of your own personal TiddlyWikis, but you can just as easily do one per wiki.

Back to the task at hand, the page tells us what we need to do:

Create a personal access token

You can create as many personal access tokens as you like.

  1. In the top-right corner, select your avatar.
  2. Select Edit profile.
  3. On the left sidebar, select Access Tokens.
  4. Enter a name and optional expiry date for the token.
  5. Select the desired scopes.
  6. Select Create personal access token.

Save the personal access token somewhere safe. After you leave the page, you no longer have access to the token.

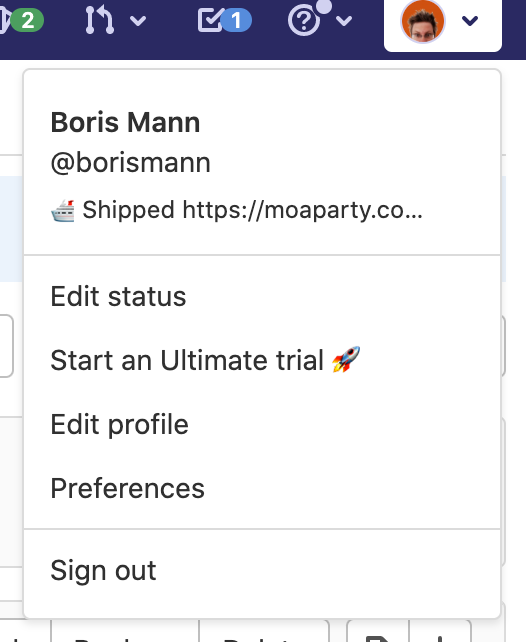
Of course, the documentation page I’m on is separate from the GitLab site itself, so there is no avatar in the top-right corner. Back to GitLab, select the Edit Profile link:

Then Access Tokens, and fill out the Token Name field. For scopes (aka permissions), you’re going to need :white_check_mark: api.

I initially thought write_repository would be enough, but it’s a special use case – we are using the API and do need the full access it provides.

Click on Create personal access token and it will display a string of upper and lower case letters and numbers. Copy it somewhere safe – or go ahead and paste it into the GitLab saver section.

Filling out the GitLab Saver
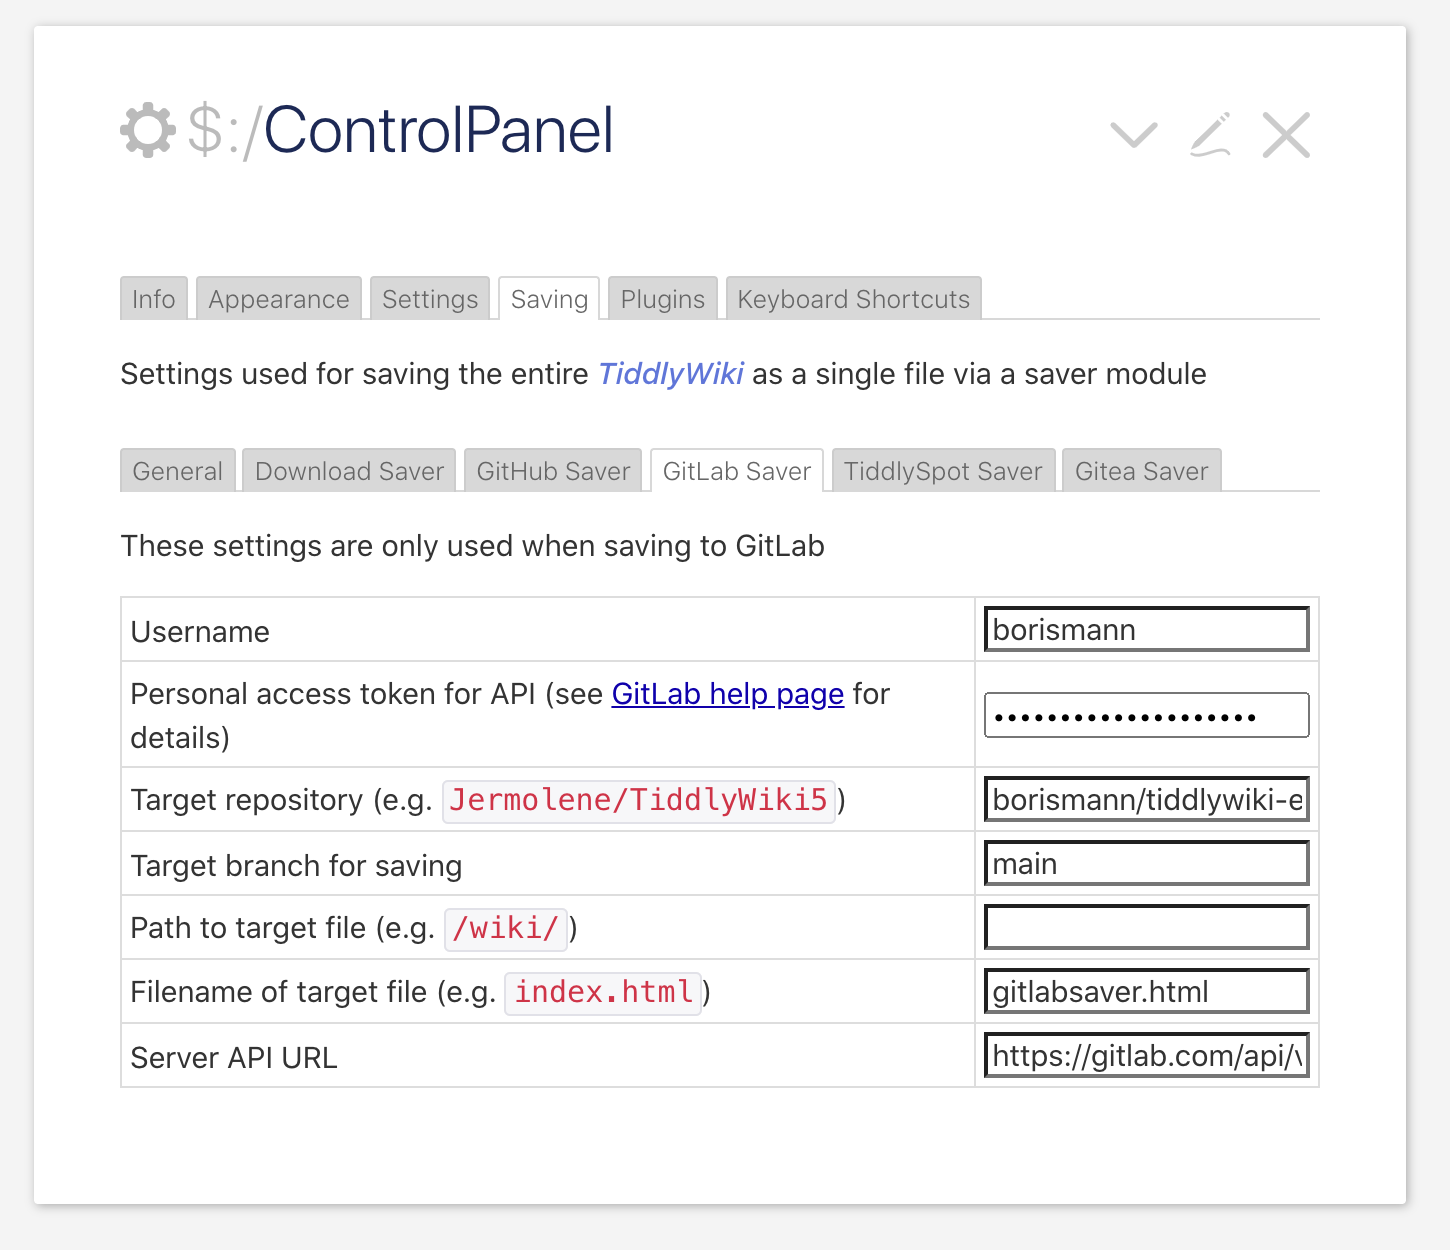
  • my username
  • the access token we just created, nicely hidden behind a password field input
  • borismann/tiddlywiki-examples is the repository
  • path is blank, the file is right in the root of the project
  • filename is gitlabsaver.html

We should be good to go! There is no “save” button here, this is just saved automatically as part of your wiki. I think the personal access token is actually saved in your local storage

I temporarily turned off automatic saving and filled in some information, running the local file just in my browser.

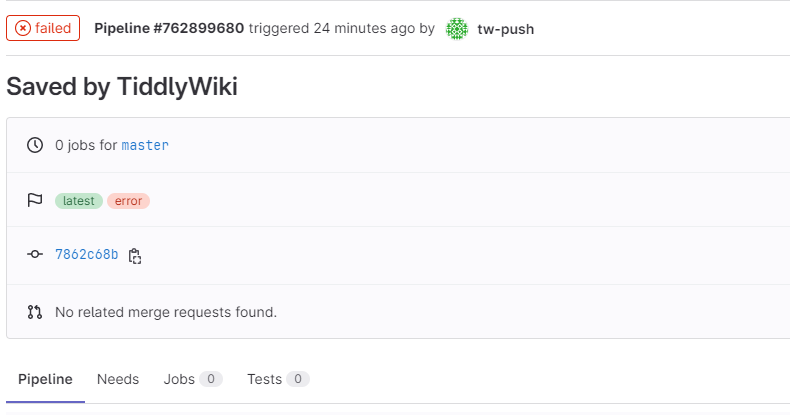
After hitting save, I got the “Saved Wiki” message after I waited for a bit.

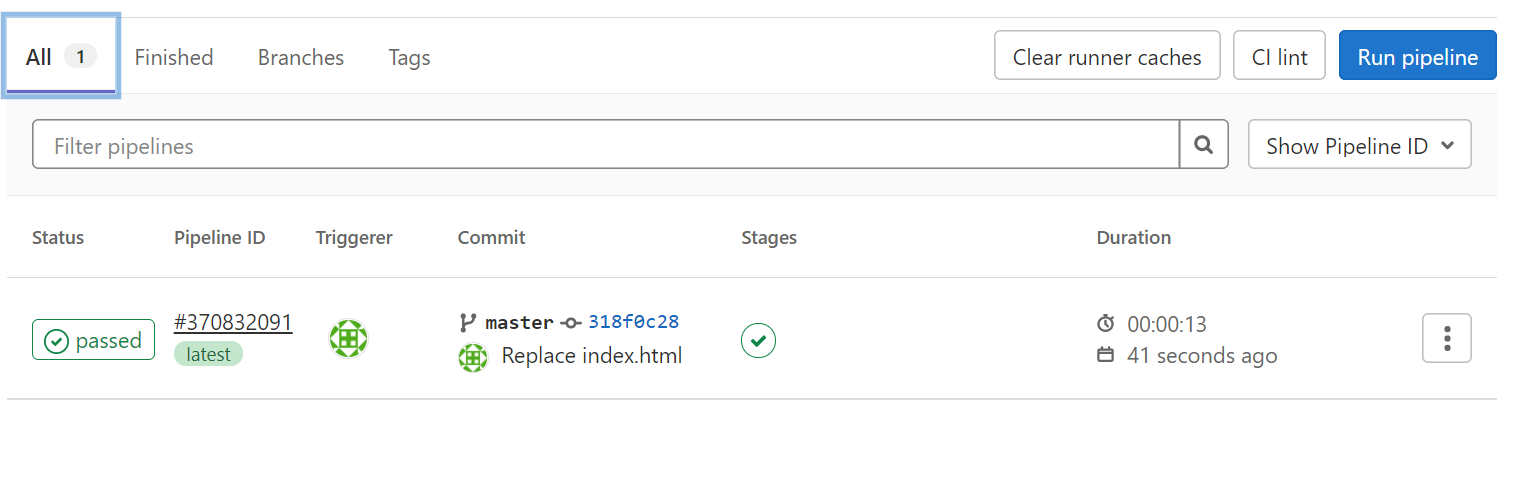
Going back to my project page, I can see the last commit message, using my username, is “Saved by TiddlyWiki”:

You’re done!

So, we have a saver setup! You can open your file on your local browser. Whenever the wiki saves, it commits a new version to the repository on GitLab.

Have questions? Having issues getting this working? Please leave a comment!

Next Steps & Questions

  • Can you change the commit message per save? This could be automatic – e.g. a list of all tiddlers since last save – or custom “added some sample content to the empty wiki about GitLab”
  • Downloading your wiki on a second computer, considerations when editing / saving the same file from multiple machines
  • I’m assuming this plugin “force commits” – so changes from multiple computers get overwritten and latest save wins, but I haven’t checked through the code
  • Setting up GitLab Pages to publish a version of your wiki that anyone can browse on the web (1)
  • Uploading images and files for use with your GitLab based wiki – manually through the GitLab interface, as well as looking at the File Uploads Git Plugin (2)
  • Setting up GitLab CI/CD to build and publish a static HTML version of the wiki to GitLab Pages (related to @saqimtiaz’s Using Github Actions to build and publish TiddlyWiki automatically)
  • Setting up a repository to clone with a variety of these things setup could be helpful. GitHub template repositories are even more useful / easier to get going with.

(1) technically, the GitLab Saver could be enabled in this mode, so it would be saving back its own file and publishing a new one at the same location. This is roughly how #fission works as well.

(2) I don’t know how different GitHub vs GitLab file uploaders are. Donate to the File Uploads OpenCollective Plugin if you want to see the git uploader working.


Most of the complexity, in my opinion, is around the very concept of GitLab, signing up for a GitLab account, creating a project, and creating an access token. GitLab is ultimately a tool for working developers and open source project maintainers, and is focused on those use cases. Its free-to-use platform, with basic free hosting (no published bandwidth limits and 10GB limit on free public repos) make it attractive to use if people are willing to learn.

4 Likes

this is great @boris ! I particularly like the next steps/questions/todo springled in your post. I have lost some data by having the same TW open on two different computers, both updating the repo, but one overwriting the changes.
I have been thinking of ways for the TW file to be aware of it’s commit hash somehow, and checking if it is still the most current version before pushing an update in (at least checking with the user before proceeding).

Seems easy enough, but the hard part is part I (for the TW to be aware of it’s associated commit hash)… part II (ie checking before saving) seems a bit easier in that one could probably API-query that || scrape that information from the latest commit in the relevant branch…

If I refresh the notebook in the browser (when the repo is “published” as Gitlab or Github Pages), the download action is controlled by the browser, and I don’t know how I could capture commit hash metadata somehow. If instead I download (to disk) the file manually from gitlab repo and then open it in the browser, it is a similar problem.

Maybe part I the first time is a manual addition to a field somewhere, and from that point onwards, the saver script can grab that information immediately after a successful update, but that opens the door to race conditions/timing issues potentially.

Anyone has ideas? I may look around this more fullsome git implementation in javascript for ideas… https://isomorphic-git.org

@boris: regarding Gitlab Pages, I operate in that mode exclusively and it works very well. Gitlab Pages have the advantage over Github Pages if one wishes to keep the resulting web URL access-controlled, without a fee. However, the publication process is triggered by an CI/CD pipeline, and not immediate (a few minutes in my experience). Something worth remembering after pushing an update that require a refresh such as a Javascript plugin, and the reflex to hit F5 immediately to take advantage of the new bells & whistles. For regular notebook updates, though, I need not to refresh, so this limitation is bearable ( I also disable autosave when working with a git repo, generally ). Github Pages updates instantaneous (HTML in repo is the one served by the webserver), however, it is limited to public projects for the free tier…

Glad you like it!

I know a number of systems that use isomorphic git (e.g. LogSeq). This saver could be upgraded to work in a similar way, but it pretty much means re-architecting.

In LogSeq’s case, there’s a statically published “app” at logseq.com, and it has functionality to link in / sync different repos.

This is roughly how #fission’s TiddlyWiki on Fission works as well, except the app is a shell TW app that Jeremy wrote, which is a bit like TiddlyDesktop. I’m going to do a Fission sign up / walk through as well soon.

Something I’ve been thinking about that might apply for both Git Saver and Fission as well, is if we could use the BrowserStorage Plugin to have very quick / local saves, and then have a longer term more persistent saver process. Technically, you need a full sync process, if multiple things are editing the same repo.

And! The most ideal way to do this is with separate .tid files, rather than a single file wiki, because then you can get changes per tiddler. This could also enable multi-user TWs with just a git saver.

1 Like

I think https://noteself.org has elements of what you have in mind, though backed by a pouchdb<->couchdb sync capabilities.

It would be great to see a write up of your GitLab Pages setup! Even just a pointer to an example project and how you have CI/CD setup would be great.

ok, no problem, will replicate and post here…

How to host and serve your TiddlyWiki notebook using Gitlab Pages…

In this post, I outline a method lets users browse to their notebook, and update it using the Gitlab Saver feature outlined above. It is a variant on @boris’ original post.

Why would I want to do that?

  • browsing to a URL to view and edit your notebook is convenient. With Gitlab pages, this can be a “private URL” that only works once authenticated, or a public URL.
  • for those interested, this is a decent way to publish your notebook for others to view (public URL) (Github Pages however has some advantages in this department)
  • note there are probably many other ways to do this, and some may be better than others. Gitlab Pages is more complex than Github Pages because it requires setting up a CI/CD pipeline that fires automagically when a commit is made, and then “generates” the file that is eventually served at your ULR. In the case of TiddlyWiki which is already an HTML file, “generates” means the CI/CD pipeline only copies the file to the web server path for it to be hosted.

I am taking advantage of simple CI/CD templates that are provided by Gitlab.

Steps:
Once logged in to your Gitlab account:

  1. From the top navigation, click the + button and select New project.
  2. Select Create from Template. (reference: GitLab Pages domain names, URLs, and base URLs | GitLab)
  3. select Pages/Plain HTML (used for static HTML pages)
  4. enter your project information and visibility

    Note: if you wish to host one of the notebook at your main URL, that is: https://yourgitlabusername.gitlab.io, the project name needs to be exactly yourgitlabusername.gitlab.io. Any other project name will be hosted at a URL with the pattern: https://yourgitlabusername.gitlab.io/yourprojectname (reference: GitLab Pages domain names, URLs, and base URLs | GitLab)
  5. create the project
  6. once the project is created a few key files will be included by default
  7. feel free to update the README.md file, though it is not used otherwise; probably best to leave the gitlab-ci.yml file alone, that is the magic that “generates” your hosted TW file (again, by “generate”, I mean copy)
  8. navigate to the public folder
  9. you can ignore the style.css, replace the index.html, with your notebook, by uploading a TiddlyWiki of your choosing


    (note the target branch name defaults to master?!)
  10. At this point, wait a couple of minutes for the pipeline to spring into action. You can see it’s result by navigating the left-hand icon/menu bar.
  11. Navigate to your URL (see above) to open your notebook
  12. (one time only) proceed as @borsis’ main above to include your gitlab particulars in the Gitlab Saver; you’ll need to match your projectname, the branch name, the /public/ path, and the filename which I recommend remains index.html

This gives you a seamless way to navigate to your notebook, edit and git-commit … and if so inclined, publish for others in a single “Save notebook” motion…

I can’t stress enough that one must wait a few minutes for the pipeline to complete before the “new” notebook is live at the URL. This is fine most times; as you don’t need to refresh your browser after every save (your browser already has the most recent version), but when installing a plugin that requires a refresh, you need to wait till the new version is available at the URL before refreshing your browser. I also recommend you disable Autosave when committing to a repo (potentially high network traffic vs performance), but it can be workable for small notebooks with Autosave on.

1 Like

I’m very specifically looking at what we can evolve from what is already available in TW core, for starters. It’s technology, we can make anything talk to anything :stuck_out_tongue: – this is all about what are the trade offs, what are native web tech we can leverage, and what is the minimal changes / new code needed for TW core.

Whilst this method used to work well to publish notebooks, I am recently experiencing an issue with Gitlab pages publishing. I am hopeful someone can help me uncover what is suddenly wrong.

The CI/CD pipeline that should take care of the publishing part of saving your notebook keeps failing.
The pipeline works well if I replace the index.html file directly using the web interface. However, unlike before, if I save the notebook, the pipeline that would publish my changes fails and it is not clear to me why that would be.

Here’s the error message (I don’t see a ton of information):


I believe TiddlyWiki commits the file correctly, but the pipeline isn’t firing to update the published version of the notebook.

As far as I know, the template’s .gitlab-ci.yml file hasn’t changed:

image: alpine:latest

pages:
  stage: deploy
  script:
  - echo 'Nothing to do...'
  artifacts:
    paths:
    - public
  only:
  - master

The issue started when I re-created my project, based off the Pages/Plain HTML template.

I solved this by using an access token associated to my account, instead of one associated to the project. I am not sure how I forgot that part, but in any case…