Using TW5 as CMS: Render JSON with HTML-Tags instead of Wikitext

Introduction: For a while now I’m using TiddlyWiki as a private Journal, running on a VPS via Node.js. I cannot think of a better utility to organize my thoughts and am very greatful for all the work and support put into it.

Recently I’ve started to create little website projects (artist and writer portfolios) with Next.js and enjoy the ease of the framework in building pretty and fast-loading designs with little animations, running a lot of optimizations in the background, which I as a relative newbee in webdesign have had no idea of.

Project: Now I am trying to combine those two things and publish some content (articles and reviews) from my TiddlyWiki on a Next.js website, turning my TW into a low profile CMS. I prefer it over a seperate headless CMS, because all the content and text-formatting is already there and I don’t have to build new data structures from scratch. During a week of studying and working on it, I made a good start with exporting/rendering tiddlers to a JSON-file and using it as a data-source for my Next.js-frontend with dynamic routing.

My shortcoming/the “problem”: I guess in the frontend it would be nice to get HTML-formatted text field content. But the JSON-files I exported from TW on the command line with the given example

tiddlywiki --render ‘.’ ‘tiddlers.json’ ‘text/plain’ ‘$:/core/templates/exporters/JsonFile’ ‘exportFilter’ ‘[tag[HelloThere]]’

or alternatively with the export button always delivered results with wikiText syntax wherever it is used inside of the text fields of my tiddlers. Messing with the render-type (setting it to “text/html”) of the command line and in a modified test copy of the jsontiddlers macro was of very limited success. I found TW-links rendered into HTML expressions on occasion, but I could not get the same result for ! headings, <<<blockquotes<<< or //italics// (which are probably the most common uses of wikiText in my tiddlers).

It seems like a very basic operation to me and I probably missed a point somewhere, yet after several days of research I have had no success. So, can you give me a hint on a solution? Is there a simple argument to pass to the renderCommand for the desired result? Or should I change my approach and maybe there is a TW-wikiText-parser in JS available to easily integrate on the frontend? I guess the JSON-format fits best for the integration, because title, tags, text and all the other fields are easy to access seperately (so I can construct previews with less, full articles with more information on the frontend from the same dataset), but maybe HTML, markdown (or even .tid) format is a better way to go?

The solution does not have to cover all the sophisticated uses of wikiText, no widgets, macros or variables are used in the articles, just some basic formatting. Providing external links and transclusions would be nice to have as a bonus.

I need to go to bed and may help tomorrow but if you look at Creating a custom export format you can work out the export mechanism, it uses a template, see especially the static html template.

  • You can construct you own exporter template to output any format generated from content found in your wiki/tiddlers.
  • You may which to “render” or wikify some things and not others, you choose.
  • I have not done it but with an exporter in place you should be able to use a command to generate them.
  • In How to export static tiddlers who’s internal links will open the master wiki where I foreshadow the ability to export multiple files into a zip file from an interactive wiki. Which you then unzip where needed.
2 Likes

Thanks for your reply! I looked into the creation of custom export formats and your great approach of exporting static tiddlers linking back to their parent wiki, but your suggestions seem to head towards generating static html pages to be displayed on the frontend.

I realised I missed pointing to a “headless” way of CMS in the title of my post, so let me give that a little focus: I intend to get only slightly formatted “content” (meaning text) out of my TiddlyWiki and then do a bunch of “fancy” or “pretty” styling on the frontend, generate previews (instead of exporting a second set of static HTML pages beforehand), let the title float in from the right, the text being revealed in a typing effect, images fading into sight, you name it… Doing this with static html pages seems hard, that’s why I was focussing on the JSON format.

I basically understand using the different export templates (like the JSON file exporter in my command line om the initial post), but I am probably missing one last modification. Let me give an example. Using the standard .JSON file export template I get this result of a Test Tiddler:

[{"created":"20220825100612259","text":"! Lorem ipsum\n\ndolor sit //amet//, consetetur sadipscing elitr, sed diam [[nonumy|https://www.example.com]] eirmod \n\n<<<\ntempor invidunt ut labore et dolore magna aliquyam erat, sed diam voluptua. At vero eos et accusam et justo duo dolores et ea rebum. \n<<<Stet clita \n\n sed diam nonumy eirmod tempor invidunt ut labore et dolore magna aliquyam erat.\n","title":"Test Tiddler","modified":"20220829174728683","tags":"export","type":"text/vnd.tiddlywiki","revision":"0","bag":"default"}]

My desired result on the other hand would look something like this (where I copied the “text” content from a static html export and stripped it from all the CSS, although I wouldn’t even mind the class names staying present and reusing them on my frontend):

[{"created":"20220825100612259","text":"<h1>Lorem ipsum</h1><p>dolor sit <em>amet</em>, consetetur sadipscing elitr, sed diam <a href="https://www.example.com" rel="noopener noreferrer" target="_blank">nonumy</a> eirmod </p><blockquote><p>tempor invidunt ut labore et dolore magna aliquyam erat, sed diam voluptua. At vero eos et accusam et justo duo dolores et ea rebum.</p><cite>Stet clita </cite></blockquote><p>sed diam nonumy eirmod tempor invidunt ut labore et dolore magna aliquyam erat.","title":"Test Tiddler","modified":"20220829174728683","tags":"export","type":"text/vnd.tiddlywiki","revision":"0","bag":"default"}]

So I’m trying to wikify/render the wikiText inside of the JSON-file and I cannot figure out how to do this kind of “nested” rendering. As I tried to put in my questions, I could also make use of a Javascript function a la “wikiTextToHTML.js” on the frontend alternatively.

If I’m allowed an external link, my frontend started off with this example, first thinking I could make use of its markdown parser, but then rewriting it to map through a JSON-file array like the one above exported from my TW (just with several tiddlers). The previews and routing work like a charm now (analogue to the demo, only the text still shows the raw wikiText syntax.

I’d be very greatful if there’s another idea about how to solve this.

Do think further here about these points;

The static html template is referenced because it generates whole pages, or complex files. But you can have any result generated, for example you may use an alternate method to generate json files if you want.

  • If you want the text field in the JSON to instead store (pre)rendered HTML it will nee to comply with JSON rules otherwise you will corrupt the JSON.
  • A way you render some wiki text into html is using the wikify widget, so inside your template it may not include {{!!text}} but <$wikify name=result text="""{{!!text}}"""><<result>></$wikifiy> not withstanding it’s need for other resources like images etc…

When going from TiddlyWiki to your “frontend” you have a choice of multiple places to convert text into the form you want, there is a lot of detail in your approach I can’t help you with, but I would recommend trying to have a one step process. TiddlyWiki to you front end files encoded in an export template as an example.

In this package I have a Snapshot tool that saves the rendered html into another tiddler and shows it instead which is a small component of what you are doing. snapshot.json (6.2 KB) its main aim is to hide dynamic content in the wiki if it impacts performance.

2 Likes

Hi @deardings … Welcome to the community.

I did prepare a response yesterday late at night, but didn’t send it … It did contain way to many assumptions on my side. … So thanks for your explanation.

I think what you need is a mixture between the “static render mechanism” and “JSON export”, which is a completely new render template. Those templates can use widgets and macros (as you found out already), but the format is not documented very well.

I did some experiments yesterday – and I think I know how you can solve it. … The prove of concept is simple. … BUT “in the details is the devil” … Especially rendering links. There are some tv- variables, that have to be set in the right way, to work with “static” pages.

I don’t have the time at the moment, but I’ll try to respond when I do.

@ everyone else … If you have a solution, there is no need to wait for my reply :wink:

-mario

Thanks for pointing me to this. I realised I got riddled by this very short “explanation” for custom export templates, because it’s calling just another export template. But then remembered that I actually do know how to make use of the usual, not export specific templates and took my way from there. For today I ended up with something like this to use as a transclusion template:

<$wikify name=result text="""{{!!text}}""" output="html">[{"title":"{{!!title}}","created":"<$view field=created format=date template=“YYYYMMDD0hh0mm0ssXXX” />","text":"<<result>>"}]</$wikify>

Which doesn’t yet do the job because the HTML shows up rendered and doesn’t stick inside the quotation marks.

So a second try, with the for this case really useful seeming “htmlwikified” viewWidget format (Unfortunately still throws a mean Javascript-Error for setting a formatting view on itself, so DO NOT USE in production):

[{"title":"{{!!title}}","created":"<$view field=created format=date template=“YYYYMMDD0hh0mm0ssXXX” />","text":"<$view format="htmlwikified"/>"}]

And as I was just inventing my handmade custom JSON-format in both templates, there remains the task to escape at least the inner quotation marks, for which the jsonstringify operator might do a good job? Also, as @pmario stated, links might have to see some special treatment and I’ll have to see if I can make use of the few CSS classes added in the “inner” HTML.

Anyway, I see good progress, thanks for all the suggestions and further ones are very welcome!

So one approach is before exporting. Create a tiddler whose visible output is the output format you expect to see (including html/JSON etc formatting etc…) If you can see it you can export it. You may want to set the tiddler this format applies to so you can test it against different data source tiddlers, or put it in a view template.

As I indicated previously, if the output is to be valid JSON, you need to research if you can include valid html inside a JSON field and or if it needs some kind of special delimiting.

It might be helpful to have a look at how this is handled for creating a JSON feed:

This is the representation of the text field:

 "content_html" : "` 
        <$wikify name="description" text={{{ [<currentTiddler>get[text]] }}} output="html"> 
               <$text text={{{ [<description>jsonstringify[]] }}}/> 
         </$wikify>
                                `"
2 Likes

My idea is similar to Saq’s code and started with the core dot-tid template … It’s a very basic one, but has the possibility to export fields, where you don’t know the names of fields in advance.

title: $:/core/templates/tid-tiddler

<$fields exclude='text bag' template='$name$: $value$
'></$fields>`
`<$view field="text" format="text" />

The fields-widget has exclude and include parameters, where include allows you to define order of fields. The order in the include parameter is preserved

Due to the nature of the TW internal storage, the order of elements stored in an object can’t be guaranteed with every browser. That’s why many widgets or filters return alphabetically sorted string-arrays. … If you need a predefined order, the include parameter can help you out.

As you can see in the code above, if you need a line-break you need to use “backtick” (`) - invisible line break - backtick (`) … see line no 2 in the code section.

So the basic rule for templates is. Whenever you need “plain text” you need to cover them in inline-code wikitext. So when the template is rendered, everything covered in single-backticks becomes plain text and widgets and macros get rendered.

That’s similar to react-templates, but they need javascript to work.

`some plain text` <$widget comes here />`more plain text`

As you found out already you can create a custom JSON template. My idea fore easier testing looked as follows, but has some flaws. That’s why I didn’t want to post it. … Especially link creation isn’t solved in the code.

The \define template() contains the code for the template tiddler. … The rest is for easy testing with a preview in a tiddler.

I did use a hashmap object as output format. It can be easily changed to an array of objects. … Just an other idea

title: json-template-wip

\define template()
`{ "`<<currentTiddler>>`": {`
<$fields exclude='text bag' template='"$name$": "$encoded_value$"
'></$fields>`
"text": "`<$wikify name="html" text={{{ [<currentTiddler>get[text]] }}} output="html"><$text text={{{ [<html>jsonstringify[]] }}}/></$wikify>`"},
}`
\end

<$tiddler tiddler="test-tiddler">
<pre><<template>></pre>
</$tiddler>

the “test-tiddler” looks like this

title: test-tiddler
an-other-field: some text "containing" quotes

! heading

some text with a link [[test-tiddler]] and "quotes", slash / and backslah \ as text

The code above shows, that TW wasn’t designed to be used that way.

Here are the tiddlers to import into a test wiki and play with the code preview … As written above. The template tiddler would only contain the code in the template-macro

custom-json-export-template-wip.json (865 Bytes)

1 Like

There are variables that can define the behaviour how links are rendered. But I don’t know them too well.

May be @jeremyruston can help out here.

The json file includes

  • 2 tiddlers tiddlers tagged: export-me
    • 1 tiddler is included in the other one as described in the OP
  • 1 tiddler with template to play with

have fun!

custom-json-export-template-list-wip-v2.json (1.2 KB)

1 Like

The following json contains 3 new functions

  1. the export-json-filter variable is defined in it’s own config-tiddler named: define-json-export-filter. So it can be easily changed, without the need to mess with the template.
    It helps if different sets of tiddlers need to be exported.
  2. the config-tiddler needs to be imported using the \import pragma
  3. The second import pragma imports all global macro definitions that may be needed.
    1. When templates are rendered with Node.js, they don’t have the “story river” context. So macros are not available to them. That’s why they need to be imported first.
\import [[define-json-export-filter]]
\import [[$:/core/ui/PageMacros]] [all[shadows+tiddlers]tag[$:/tags/Macro]!has[draft.of]]

define-json-export-filter is not tagged as a global macro filter and it shouldn’t so it needs to be imported extra.

have fun!

custom-json-export-template-list-import-v2.json (1.5 KB)

Thank you so much @pmario and @saqimtiaz for your detailed code examples and great explanations! Understanding how to use backticks for the plain text and intertwining it with widgets already helped a lot with my slight syntax leghasteny. I actually liked the structured format of Saq’s code very much, because it provides a useful selection of fields to work with and I would have had to think about generating IDs at some point anyway. Mario’s approach also impressed me by addressing a lot of issues, which I would have not thought of on my own. Seeing links, transclusions and macros integrated in the export is even more than I asked for.

My first quick exports already rendered on the (still improvised) frontend like a charm, though I will certainly have to spent some time playing around with the given templates and ingesting all the information.

I already knew I loved the TiddlyWiki community long before I ever posted, but this time you really made my day :hugs:.

1 Like

So, after thinking about how to best integrate a TiddlyWiki as CMS into a Next.js app and testing through different scenarios, I found a solution that seems to work quite well. I decided to share my results with the community and initialised my first ever public Github repository.

There might be certain flaws by design concerning all the fancy Next.js dynamic import stuff and the use of a single JSON file as data storage, but I am really happy with the seamless integration I achieved.

In case you’re just a tiny bit familiar with Next.js or even just interested, have a look, judge for yourself and let me know what you think: https://github.com/deardings/nextjs-with-tiddlywiki.

Thanks again for the support, you can find a lot of the hints and examples from this thread getting used on the TW side of my project.

1 Like

Hi, I use Tiddlywiki like CMS for 7 years
I generate static html pages of all site and automaticly send by php form Tiddlywiki page to my hosting (static cut by blob)
Examples
Heeg.ru
Tiddlywiki.ru
Papadoma.net

AND so on https://groups.google.com/g/heeg/c/G0eSqbJBvZg/m/9Jr0dtu6CAAJ

2 Likes

The paintings here are absolutely amazing! What she has created are very beautiful!

1 Like

Thanks for sharing @Siniy-Kit ! I just remembered seeing some of your pages a couple of years ago and being impressed by the versatile layouts. Back then I wasn’t able to construct a comparable layout myself and chose a simple wordpress site instead, where I manually entered my content and used the given templates.

Du you by any chance have a “minimal” example of your worflow in english language? I’d be eager to find out, if/how you constructed the sidebars and animations using static html tiddlywiki content.

Small instruction how to make site on Tiddlywiki+ Spreadsheets if you don’t have hosting and site.

  1. Click this link and make copy https://docs.google.com/spreadsheets/d/1aHqwMMdWco5hBPiESJvCRJ3C-MfpAes-JbItlClVgLw/copy

  2. Run Spreadsheet macros with many alert “no"no"no” in top right corner “HEEG магазин” to create forms and additional spreadsheets.

  3. Modify google spreadsheet and refresh page to see how your shop changes.

To make static cut open #static_cut

if you want to make static cut directly to your hosting by php (and save images to hosting)
create php folder and put save.php (or get here https://heeg.ru/heeg_2.4_excel_php.zip) to this folder WHIth YOUR PASS
and put url link to this file in google spreadsheet on line $:/_siteSavePhp

<?php

/////////////УСТАНОВИТЕ ПАРОЛЬ, который будет использоваться в поле PhpPass для сохранений страниц и картинок на сервер через PHP///////////

$PhpPass = "YOURPASSSSSShere";


if(isset($_POST['phppublic'])){


 if($_POST['name2']==$PhpPass) {

       $namehtml = $_POST['namehtml'];
       $mess = $_POST['client_comments2']; 


 $file=fopen("../" .$namehtml, "w");
fwrite ($file, $mess);
fclose($file);

        echo 'Ваш магазин опубликован.'; 


}else{echo 'Произошла ошибка при публикации. Проверьте пароль'; };

}


// ПОЛУЧЕНИЕ КАРТИНОК, если в $_FILES существует "images" и она не NULL
if (isset($_POST['phpimages']) and $_POST['name2']==$PhpPass and isset($_FILES['images'])) {

$prefix = $_POST['prefix'];
    // Изменим структуру $_FILES
    foreach($_FILES['images'] as $key => $value) {
        foreach($value as $k => $v) {
            $_FILES['images'][$k][$key] = $v;
        }
        // Удалим старые ключи
        unset($_FILES['images'][$key]);
    }
    // Загружаем все картинки по порядку
    foreach ($_FILES['images'] as $k => $v) {
        // Загружаем по одному файлу
        $fileName = $_FILES['images'][$k]['name'];
        $fileTmpName = $_FILES['images'][$k]['tmp_name'];
        $fileType = $_FILES['images'][$k]['type'];
        $fileSize = $_FILES['images'][$k]['size'];
        $errorCode = $_FILES['images'][$k]['error'];

        // Проверим на ошибки
        if ($errorCode !== UPLOAD_ERR_OK || !is_uploaded_file($fileTmpName)) {
            // Массив с названиями ошибок
            $errorMessages = [
                UPLOAD_ERR_INI_SIZE   => 'Размер файла превысил значение upload_max_filesize в конфигурации PHP.',
                UPLOAD_ERR_FORM_SIZE  => 'Размер загружаемого файла превысил значение MAX_FILE_SIZE в HTML-форме.',
                UPLOAD_ERR_PARTIAL    => 'Загружаемый файл был получен только частично.',
                UPLOAD_ERR_NO_FILE    => 'Файл не был загружен.',
                UPLOAD_ERR_NO_TMP_DIR => 'Отсутствует временная папка.',
                UPLOAD_ERR_CANT_WRITE => 'Не удалось записать файл на диск.',
                UPLOAD_ERR_EXTENSION  => 'PHP-расширение остановило загрузку файла.',
            ];
            // Зададим неизвестную ошибку
            $unknownMessage = 'При загрузке файла произошла неизвестная ошибка.';
            // Если в массиве нет кода ошибки, скажем, что ошибка неизвестна
            $outputMessage = isset($errorMessages[$errorCode]) ? $errorMessages[$errorCode] : $unknownMessage;
            // Выведем название ошибки
            die($outputMessage);
        } else {
            // Создадим ресурс FileInfo
            $fi = finfo_open(FILEINFO_MIME_TYPE);
            // Получим MIME-тип
            $mime = (string) finfo_file($fi, $fileTmpName);
            // Проверим ключевое слово image (image/jpeg, image/png и т. д.)
            if (strpos($mime, 'image') === false) die('Можно загружать только изображения.');
            // Результат функции запишем в переменную
            $image = getimagesize($fileTmpName);
            // Зададим ограничения для картинок
            $limitBytes  = 1024 * 1024 * 12;
            $limitWidth  = 12800;
            $limitHeight = 7680;
            // Проверим нужные параметры
            if (filesize($fileTmpName) > $limitBytes) die('Размер изображения не должен превышать 12 Мбайт.');
            if ($image[1] > $limitHeight)             die('Высота изображения не должна превышать 7680 точек.');
            if ($image[0] > $limitWidth)              die('Ширина изображения не должна превышать 12800 точек.');
            // Сгенерируем новое имя файла через функцию getRandomFileName() или нет....
   //         $name = getRandomFileName($fileTmpName);
$name = $prefix .substr($fileName, 0, strpos($fileName, '.' ));


            // Сгенерируем расширение файла на основе типа картинки
            $extension = image_type_to_extension($image[2]);
            // Сократим .jpeg до .jpg 
            $format = str_replace('jpeg', 'jpg', $extension);
$fileName= str_replace('jpeg', 'jpg', $fileName);
            // Переместим картинку с новым именем и расширением в папку /pics
   //   if (!move_uploaded_file($fileTmpName, __DIR__ . '/upload/' . $name . $format)) {
   //     if (!move_uploaded_file($fileTmpName,  '../images/' . $name . $format)) {
     if (!move_uploaded_file($fileTmpName,  '../images/' .$prefix .$fileName)) {
                die('При записи изображения на диск произошла ошибка. '  .$fileName);
            }
        }
    };
    echo 'Файлы успешно загружены!';
};


// File functions.php
function getRandomFileName($path)
{
    $path = $path ? $path . '/' : '';

    do {
        $name = md5(microtime() . rand(0, 9999));
        $file = $path . $name;
    } while (file_exists($file));

    return $name;
}


?>


1 Like

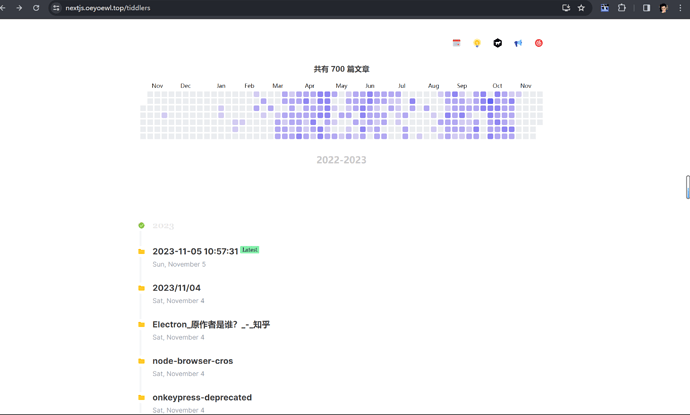
I just used nextjs to render some data from tiddlywiki as front-end re-rendering. The difference is that I only rendered the file type as markdown, so I don’t need to perform any additional special processing on the tiddlywiki json data source. The Nextjs Blog is dynamically updated with the Automatic build updates for https://neotw.vercel.app/

1 Like