Underlining Headings (Complete Novice)

Hello! I am comedically inexperienced with tiddlywiki, html, css stuff and the like, and while I’m endeavouring to learn (slowly) there’s a specific thing that I’d really, really like to be able to emulate and was wondering how to do it.

Grok TiddlyWiki — Build a deep, lasting understanding of TiddlyWiki has underlined headings in a style that I absolutely adore, and seems to have done it by editing what a heading itself looks like. I would greatly appreciately any advice on how to replicate this specific look, as well as useful resources on how to generally spice up my tiddlywiki from an aesthetic standpoint.

Welcome tiddlyClock,

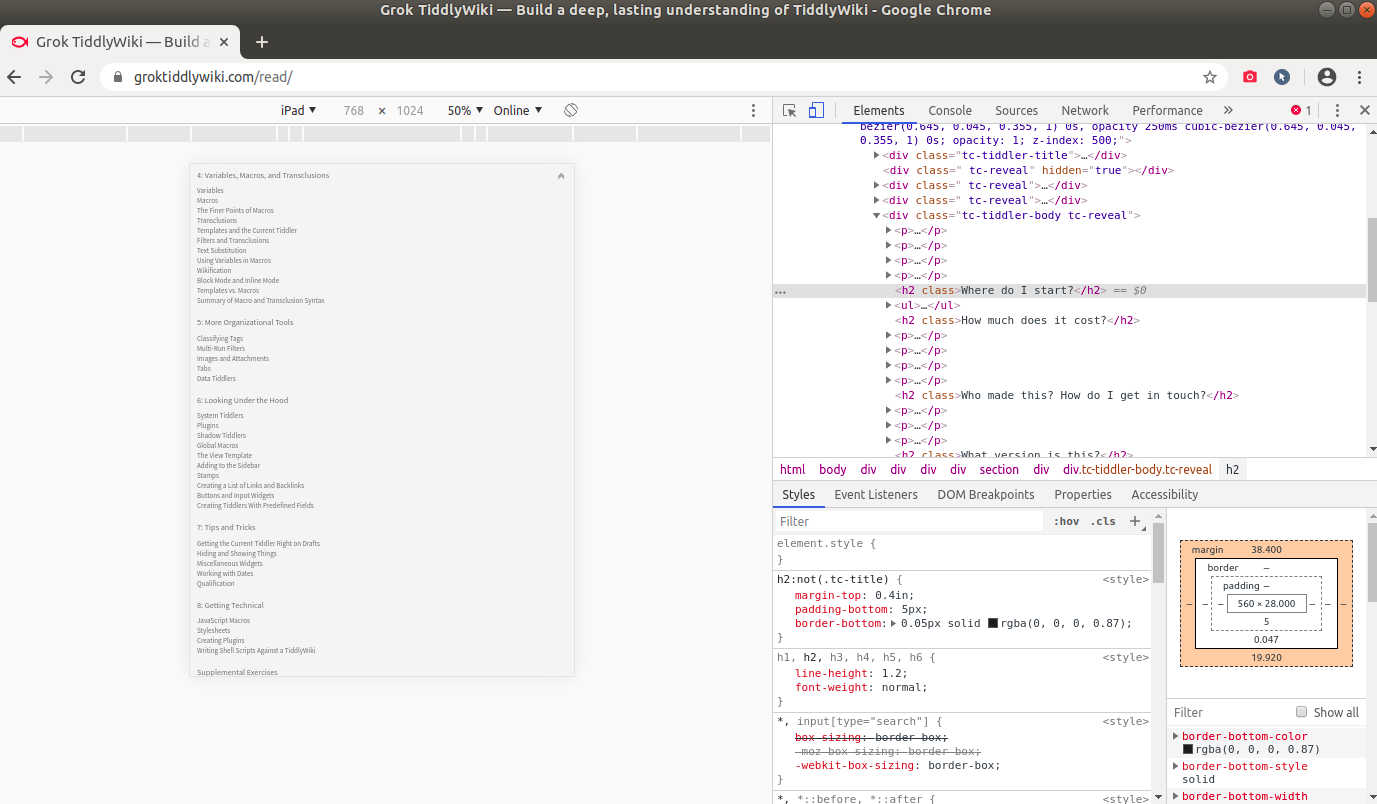
To do answer your question I followed your link to the Grok web page went into the developer tools section of my browser, selected the title that you indicated and inspected the html and CSS.

This showed me that the CSS for the h2 tag is as follows…

h2:not(.tc-title) {
  margin-top: 6ex;
  margin-top: 0.4in;
  padding-bottom: 5px;
  border-bottom: 0.05px solid rgba(0, 0, 0, 0.87);
}

Border bottom looked like the likely candidate - what you cannot see here is that I was able to turn on and off this particular line of CSS and observe that the underlining you observe did indeed appear and disappear - so confirmation there! In Mozilla developer tools I was presented with a tick box next to each line of CSS so I can toggle it on and off - most browsers have similar tools.

My next task (if I were in your shoes) would be to investigate this a bit further perhaps see if it also appears for H1 tags or maybe not - often its a good idea and sense of achievement just to get one thing working (say H2 on it’s own) and take it from there.

You would be then looking to add a custom CSS tiddler and your first entry would look something like the above code - crucially the border bit.

Sorry this is not a sufficiently detailed description at best it’s a list of steps to take.

Try Google - search on ‘Developer tools Mozilla’ or whatever browser you use - you want the inspect tool which is a great way to dive straight into the bit of HTML you are interested in. Highlight the title and try and find your way to seeing screens to show you the HTML and associated CSS.

You will probably also find answers from Google or searching this site on custom css for tiddlywiki.

https://firefox-source-docs.mozilla.org/devtools-user/

https://tiddlywiki.com/static/Using%20Stylesheets.html

If you think you will find yourself in the same position in the future then learning the browser developer tools, perhaps whilst “on the job” of solving whatever problem you face will likely be time well rewarded - it allows you to unpick other people’s web pages and so learn how they went about it.

You can also try out CSS experiments within the browser tools - it will let you change the CSS for your local view of say the Grok page and so check out how your proposed mods will look before you add them to your own Tiddlywiki. For instance perhaps you wanted the underline a bit thicker in a different colour - you can mess around and play with it which is a great way to learn.

Tip give your custom CSS tiddler a fairly obvious title like … “Custom CSS” easy to remember when you want to make changes.

So you could start by following the instructions in the second link above - make your own Custom CSS tiddler - try copying in the CSS above and see what happens - suggest you try on an empty tiddlywiki file to begin with rather than risk the one you are working on. Always a good idea to have a test bed Wiki you don’t care about to try stuff out initially.

I am sure others will reply - I will try and add more if not - sorry pushed for time right now.

1 Like

The style is set in this tiddler - look for h2

https://groktiddlywiki.com/read/#%24%3A%2Fsib%2FStylesheet

BJ

1 Like

Thank you both for this, I wasn’t sure where to look for stylesheet stuff and I wasn’t super super how to parse it either so the link is very useful buggyj

I think this is something that’s, on the whole, a little bit above my skill level for the moment, but I’m looking forward to learning things like this. I feel like html and css stuff has been a gaping hole in my understanding of regular computer usage and this has been a good prompt to maybe understand it a little better.

Specifically though for jonnie45’s stuff, I’m using chrome and I’m finding a lot of css stuff in the elements tab in developer tools but I’m struggling to find the bit you managed to find. I don’t suppose you’re familiar enough with chrome’s developer tools that you could tell me where I should be looking?

Understand if this would be tricky to explain, you’ve already helped more than enough and it’s appreciated.

No problem - just one caveat I am working on Linux so there is always a slim chance my Chrome is not 100% the same as yours…

Navigate to the ‘Grok’ page and right mouse click on the title of interest in this case - “Where Do I Start?”

You should see a pop up that offers an option called “Inspect” - might also be ctrl+shift+i

Hopefully you should see something like the following image although your panes might be arranged differently.

The image above is probably a bit too small to read and I did compress the file, you will probably need to use the enlarge which appears in the bottom tool bar of the image when you mouse hover over it.

Hopefully you can see the html and the CSS displayed - in my case in the two panes on the right - for you it could be different.

Just to confuse matters when I look at the page in chrome I don’t actually see the underline - maybe something different on my browser, I think we should ignore that here, I could look into why but I would rather brush over that for now.

As long as you see the underline, the css and the html then that’s all that matters here.

In the top right pane (as shown) the html is displayed for the title “Where do I start” and in the lower right panel we see the CSS for h2 as pasted somewhere higher up in this thread.

If we are good so far then when you hover over the CSS for h2 you should see tick boxes appear so that you can speculatively turn off or turn on individual lines of CSS - a good “prod it with a stick and see if its the line of CSS I am actually looking for” approach.

You should also be able to click on a small grey square within the h2 CSS border-bottom statement to change the colour - again good for testing tweaks and so on - just mess around to get the feel, you are not altering the ‘official’ version of this page just your own temporary view of it so there is no need to be careful.

The inspect method is probably the quickest and easiest method to get to the html and css for a specific thing you are interested in - kind of gets you straight in there which is probably best until you find your way around a bit more.

Once you are happy with this then the other part of the process is to take whatever CSS modification you intend to try out and follow the second link in my earlier post which is very easy. You just need to create a tiddler as described and paste your CSS in.

CSS uses a ‘cascade system’ which means that CSS declared in one place can be over ridden by CSS declared in another place according to a hierarchy. The CSS declared in your custom CSS tiddler should have higher priority than the base tiddlywiki CSS and so over ride the regular CSS. If ever you find you are not over riding some CSS as you expected look up “!important CSS” but use with discretion as it is not an elegant but rather blunt-last-resort method.