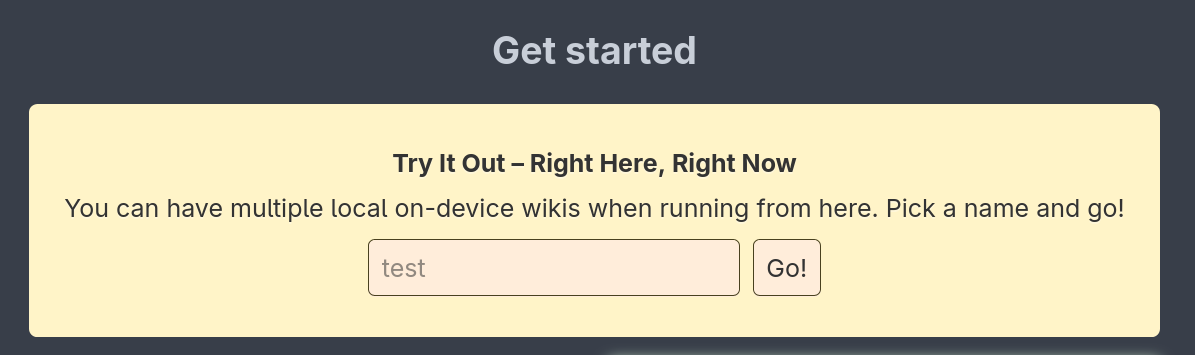
I am having difficulty seeing how to actually set up TiddlyPWA
Well, the expected flow is that you just click “Go” on the website 
(and then, once you decide to proceed to a multi-device setup, you read the whole “setting up a sync server” part)
but I’m definitely missing some “guide for existing users” there, sorry.
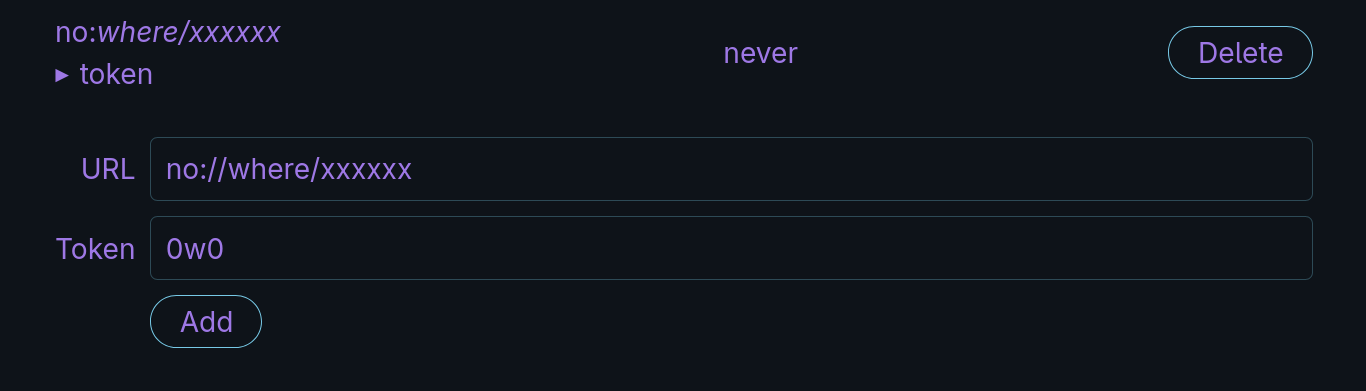
There is an “Add” button to click but nothing apparently happens
Very strange. The add button should work even if you put arbitrary junk there:
Does anything appear on the browser’s JS dev console? What browser are you using?
How is “your wiki” set up? Do not install the TiddlyPWA plugin into existing wikis that use another sync method. That’s not how it works.
You can use the sync server settings with the “add” button from an existing TiddlyPWA wiki that you’ve already started filling in a single-device setting, i.e. via the “try now” thing above. (After first syncing the content, you’ll also be able to upload the app wiki to the server right from there.)
If you want to get started directly on a sync server, just UploadApp first, then visit the uploaded URL. The API endpoint will be preconfigured automatically.
In any case, if you want to import content from an existing wiki, you need to use the actual export & import functionality (including drag&drop).
If you go to the url http://localhost:8000/tid.dly there is no wiki there
That’s the API endpoint, not the URL for the wiki itself. (Definitely should add some dummy HTML for anyone accidentally visiting it with a browser!)
The app wiki URL as hosted by the sync server will appear in the control panel once you do UploadApp. (Well, also directly in the upload form.)