Intro
In Notes on tiddlers stored in a data tiddler, @TW_Tones describes a proof-of-concept system for storing metadata about certain tiddlers, not in their fields but in a single JSON tiddler. The discussion about this ranged widely, but a very important point was that Tones was attempting to draw attention to the details of how this was built rather than to its core features:
I spent some of that discussion in critique of how this presentation was made. But if I’m going to do this, I need to be willing to put my money where my mouth is. So here I go. I’m going to try to document how I might build a similar system. To be clear, I am not trying to precisely duplicate what @TW_Tones did, but build a version of the same core idea that works the way I would like.
But here too, the process of building and the techniques used are the most important part of this discussion. The end product is… fine, but not very exciting. It won’t be even when complete. I’m not going to do any comparisons of the two outcomes. The only differences I know of are that mine handles multiple notes per tiddler, and that I have a solution of sorts for the rename conundrum he mentions:
There was a bit of an answer to the unspoken question of, “well how would you do this better?” But that’s not quite it, either. It’s not a competition, but a demonstration of the style of documentation I prefer. In this case, I’m documenting the series of steps I might take to build something like this. I might later do a second pass that only explains the completed solution.
Note that because this post was too long for TW, we’re breaking it into this initial section and a collection of answers.
(Edited to add:)
Target Audience
This is not for everyone. Specifically, it’s not designed for those new to TiddlyWiki. This is for users who have already done some customization of their wikis, in some combination of
- Adding and configuring plugins
- Creating custom styles
- Using widgets, macros, procedures, and/or functions to display dynamic content
- Creating custom templates
The reader does not have to have done all of these, but those who’ve done none will likely struggle to keep up.
Advanced users will not likely learn much technically new here, but they may still appreciate the perspective and the manner of module development.
Contents
- Intro (you are here)
- What We’re Building
- Following Along
- Step 1 - Show footer with note-count
- Step 2 - Styled, expandable section
- Step 3 - Display note content
- Step 4 - Make
addbutton functional - Step 5 - Adding controls for individual Notes
- Step 6 - Edit and save modes
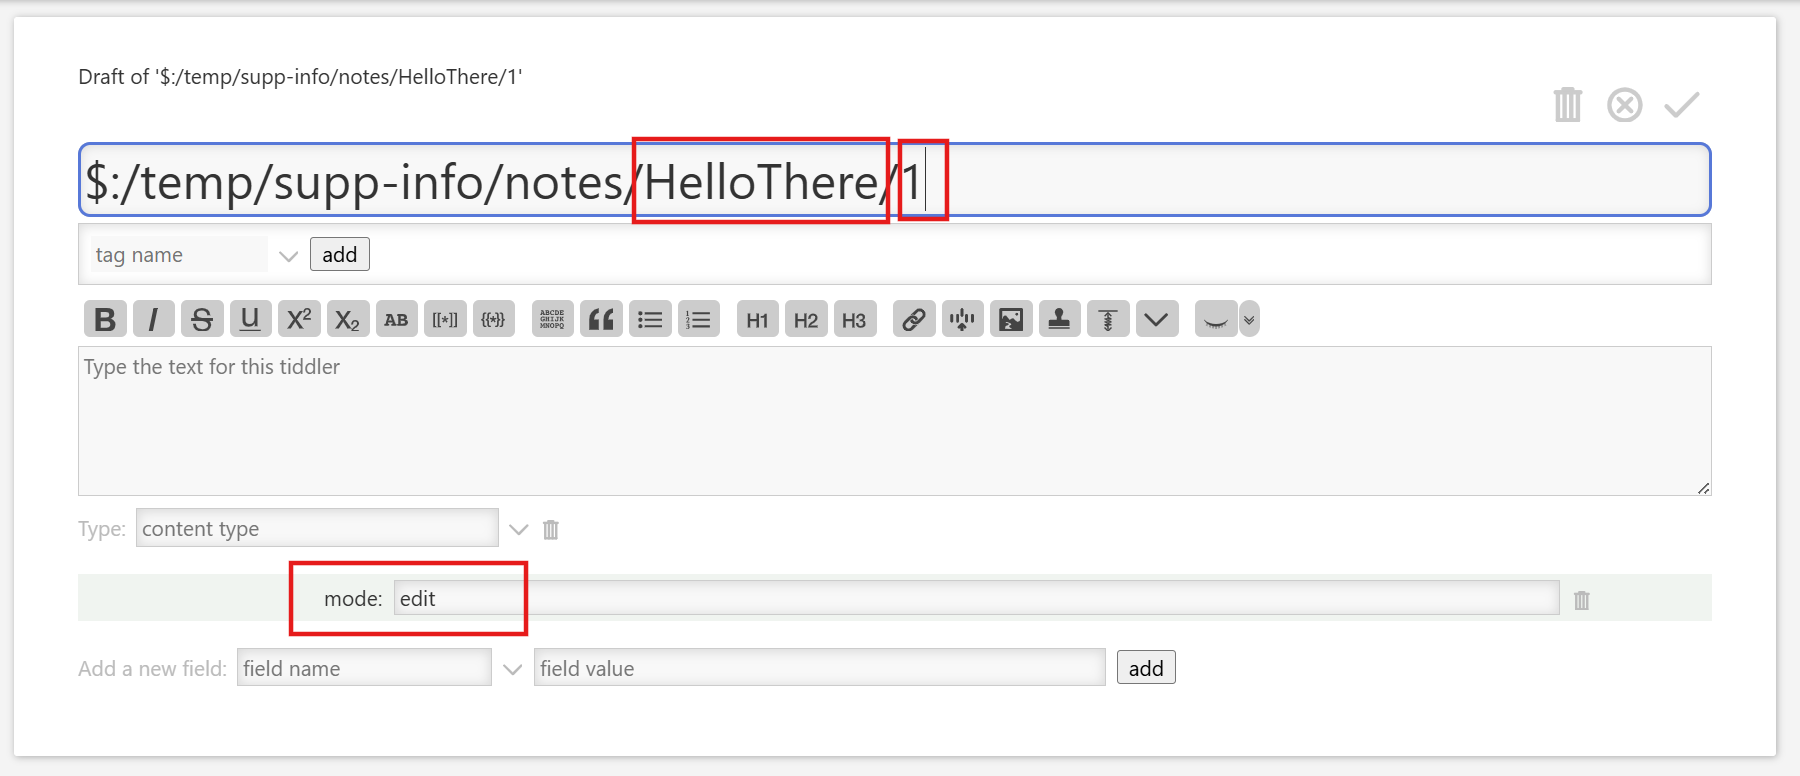
- Step 7 - Make edit and save work
- Step 8 - Make notes open in edit mode when added
- Step 9 - Handle all tiddlers, not just preconfigured ones
- Step 10 - Handle tiddler renaming
- Step 11 - Use palette colors
- Step 12 - Your turn
- Conclusion
What We’re Building
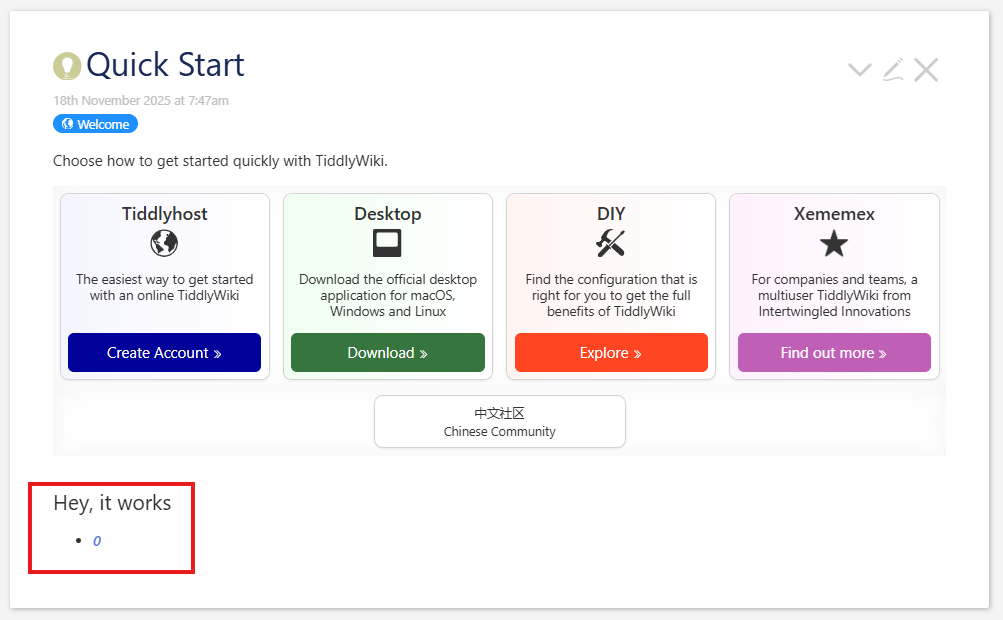
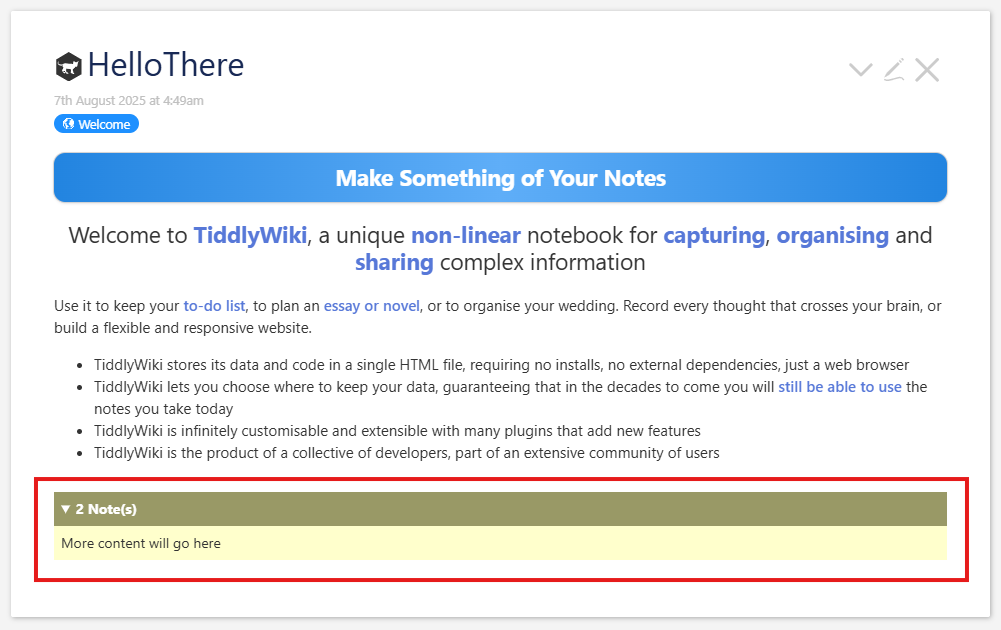
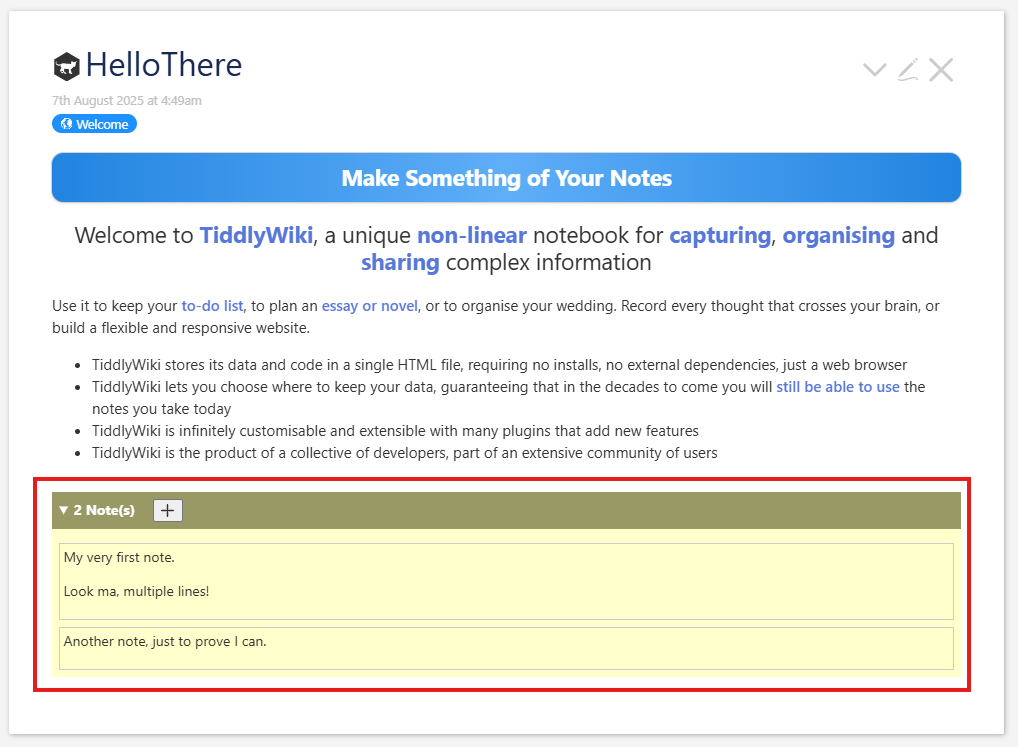
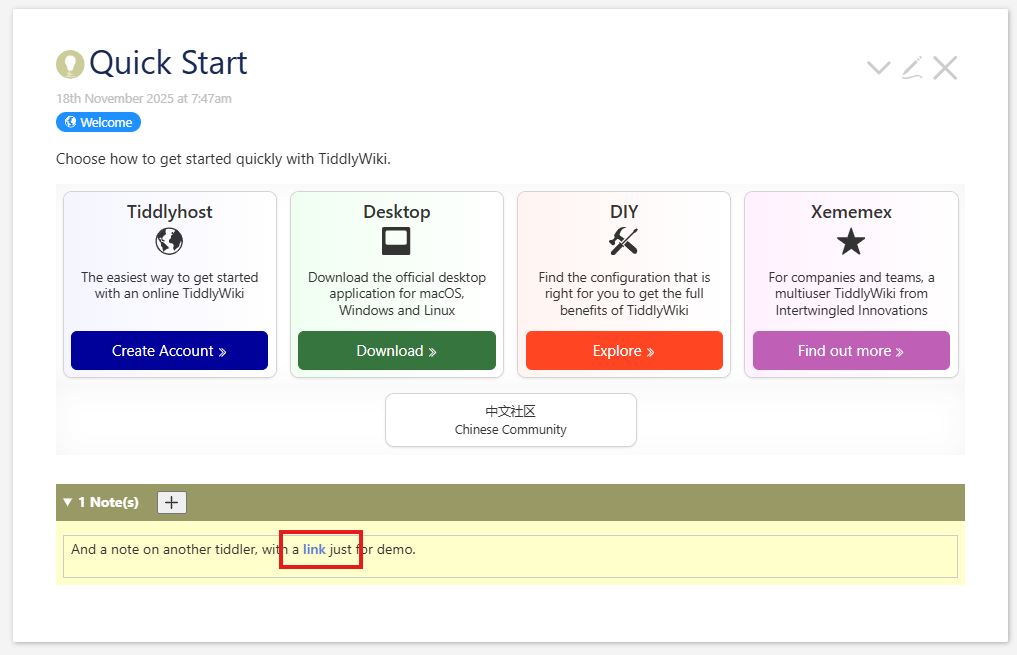
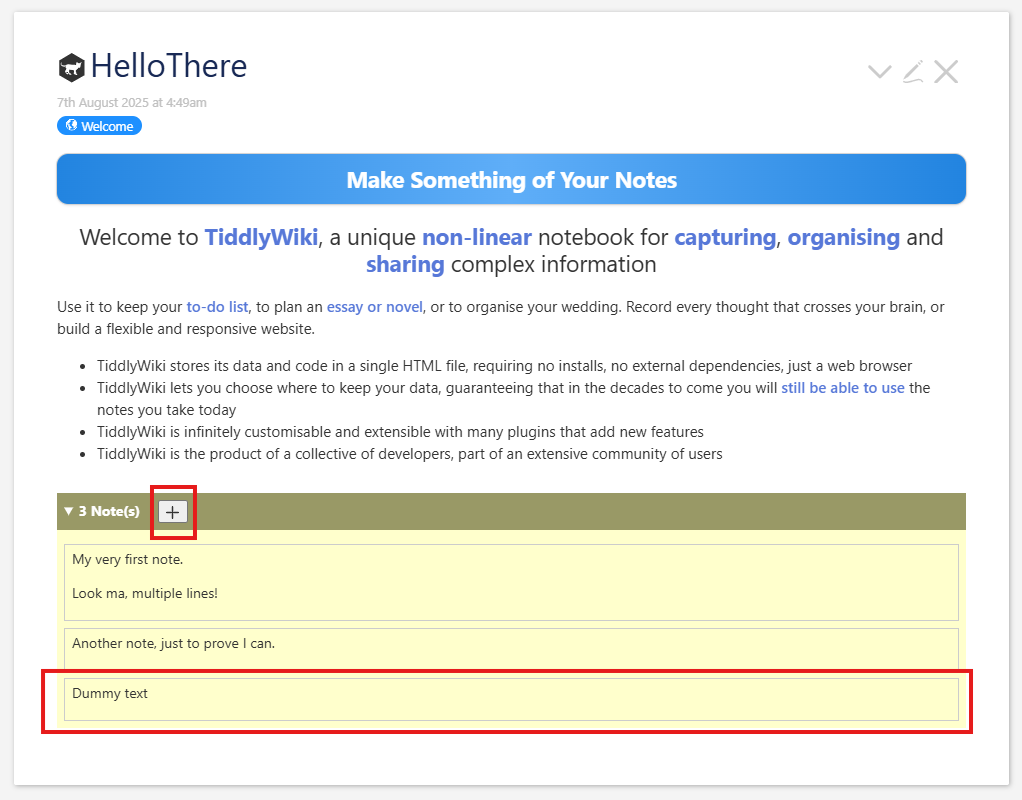
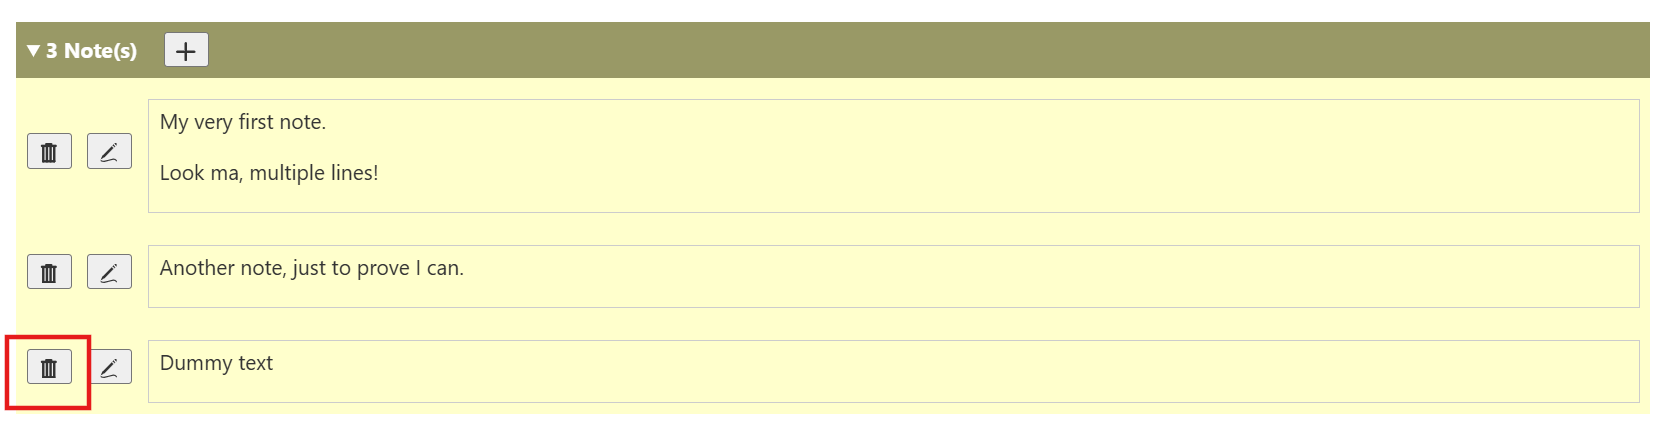
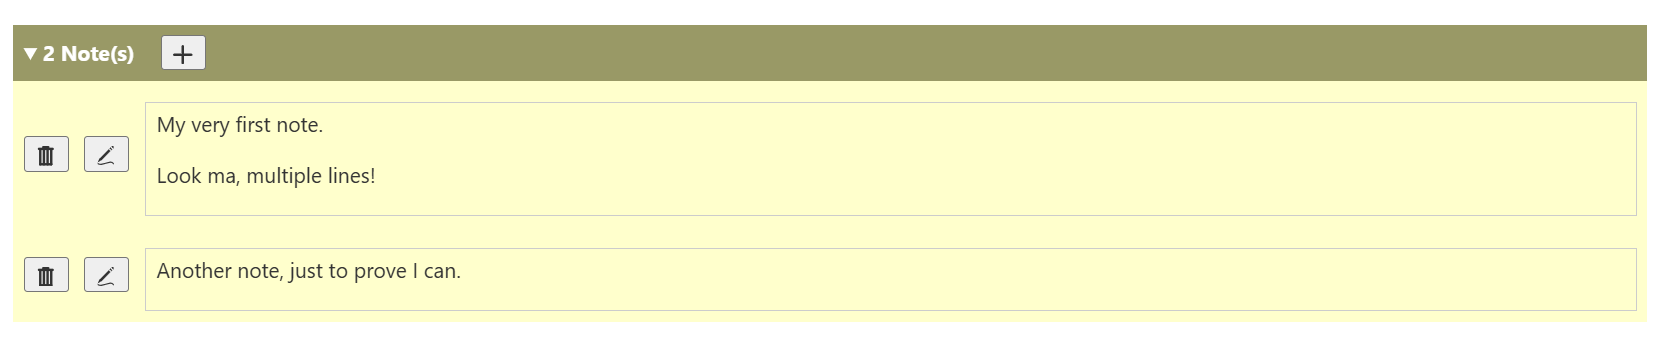
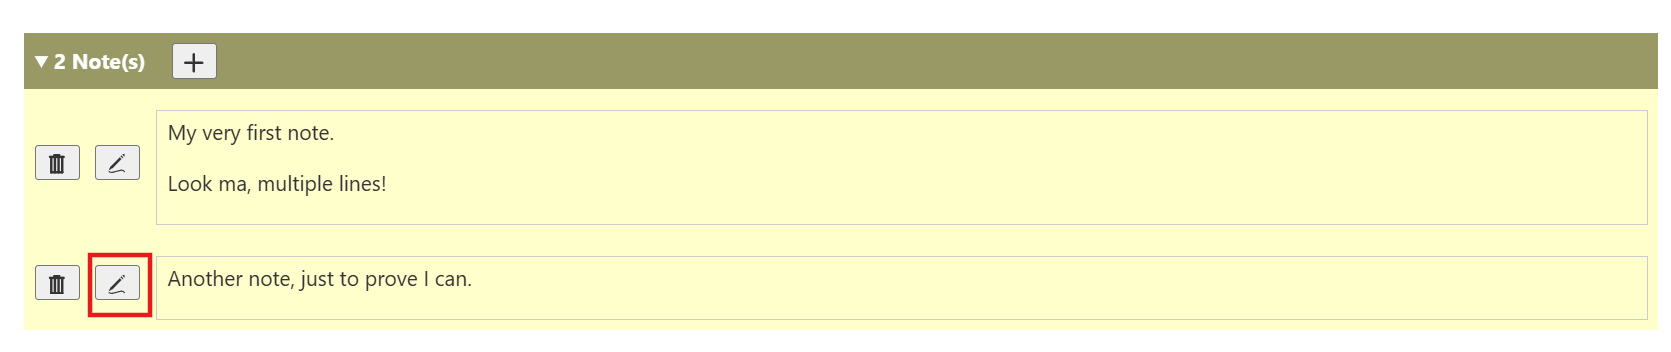
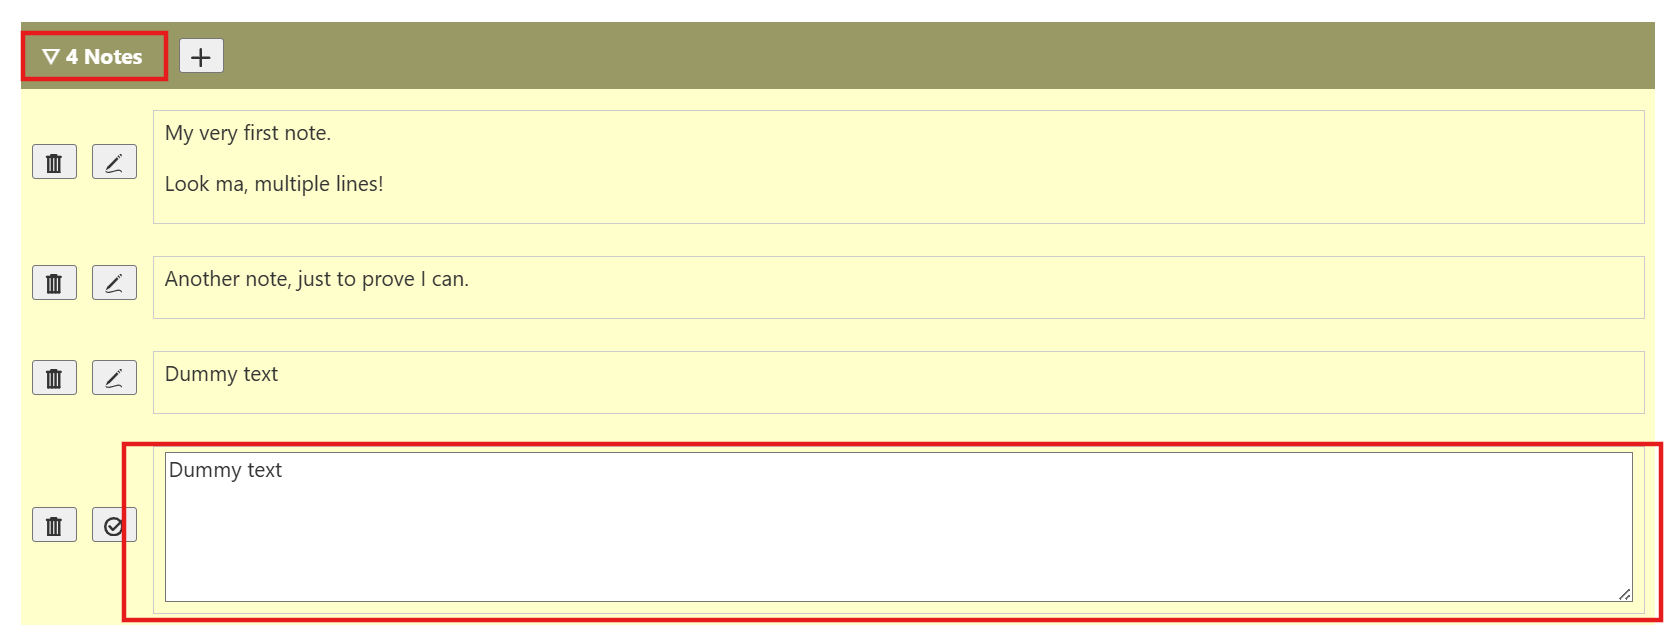
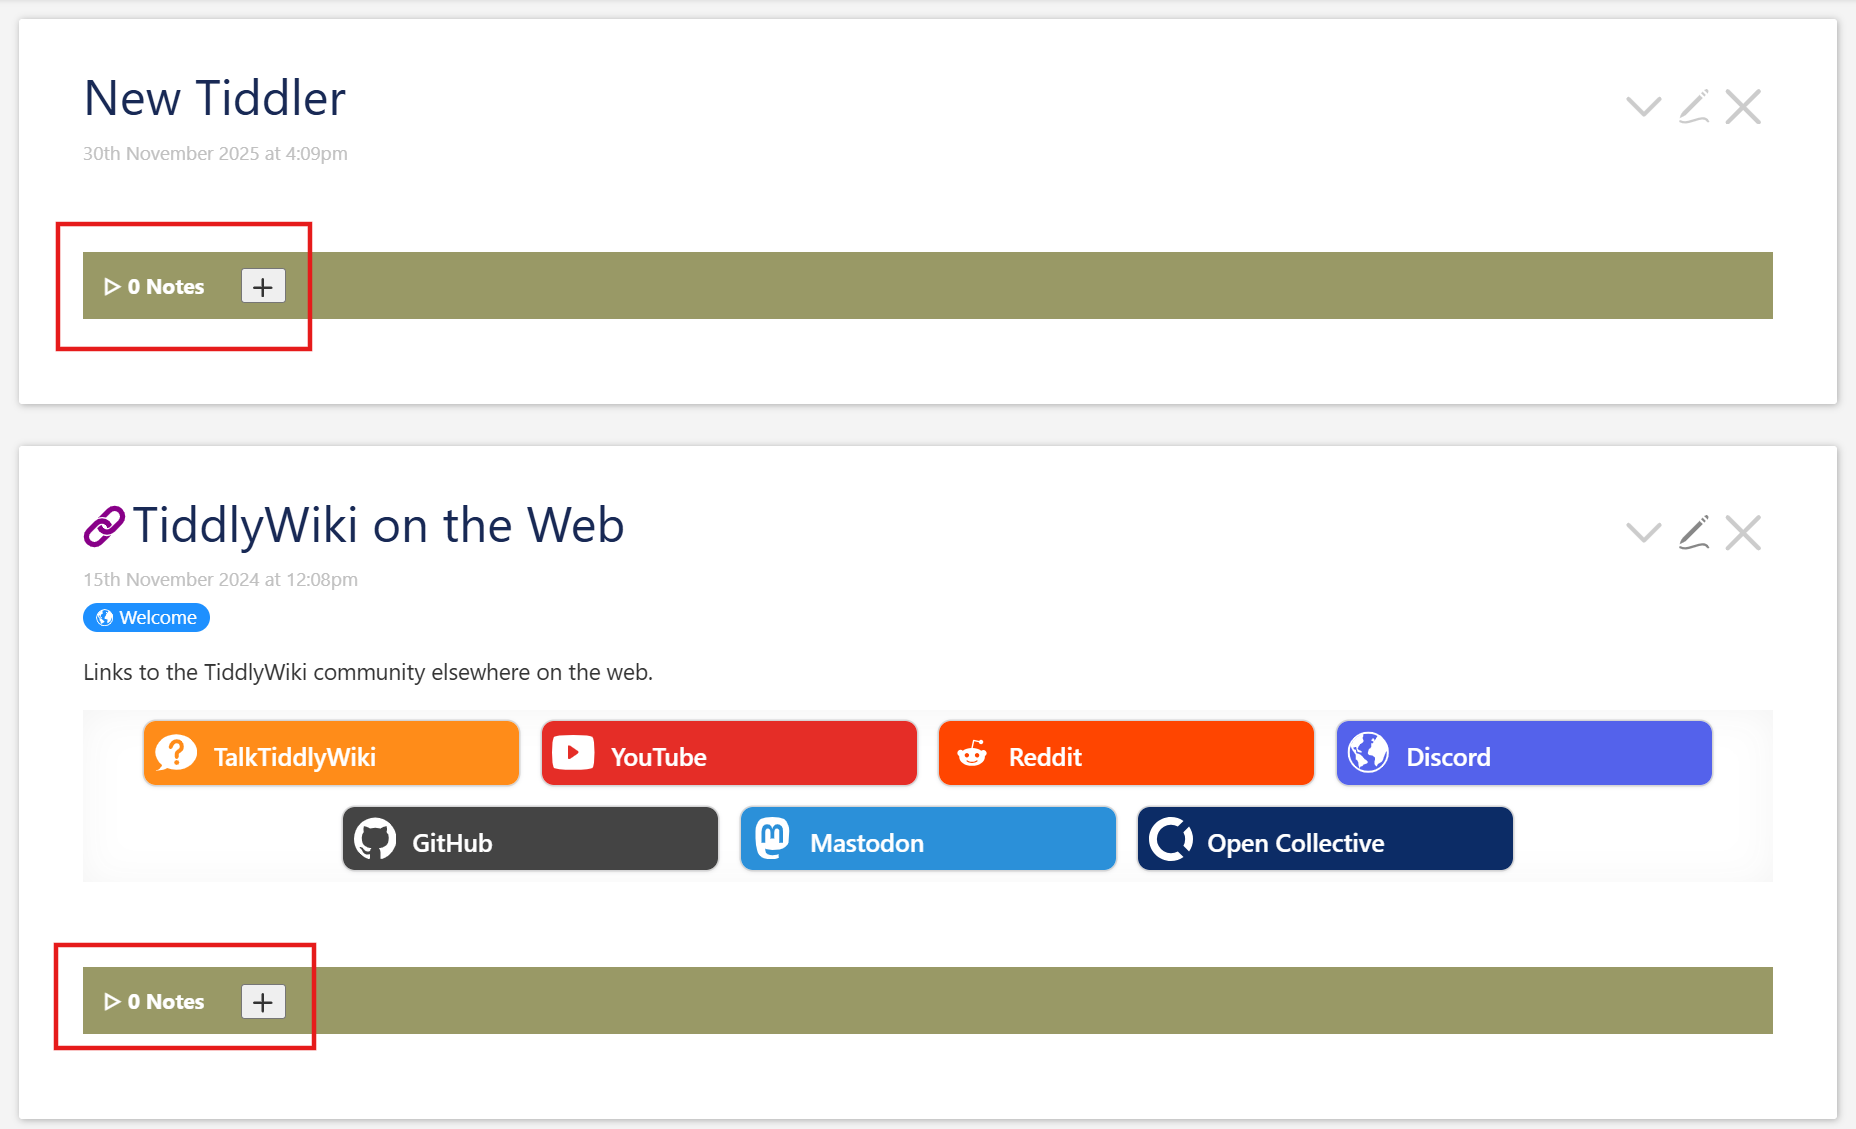
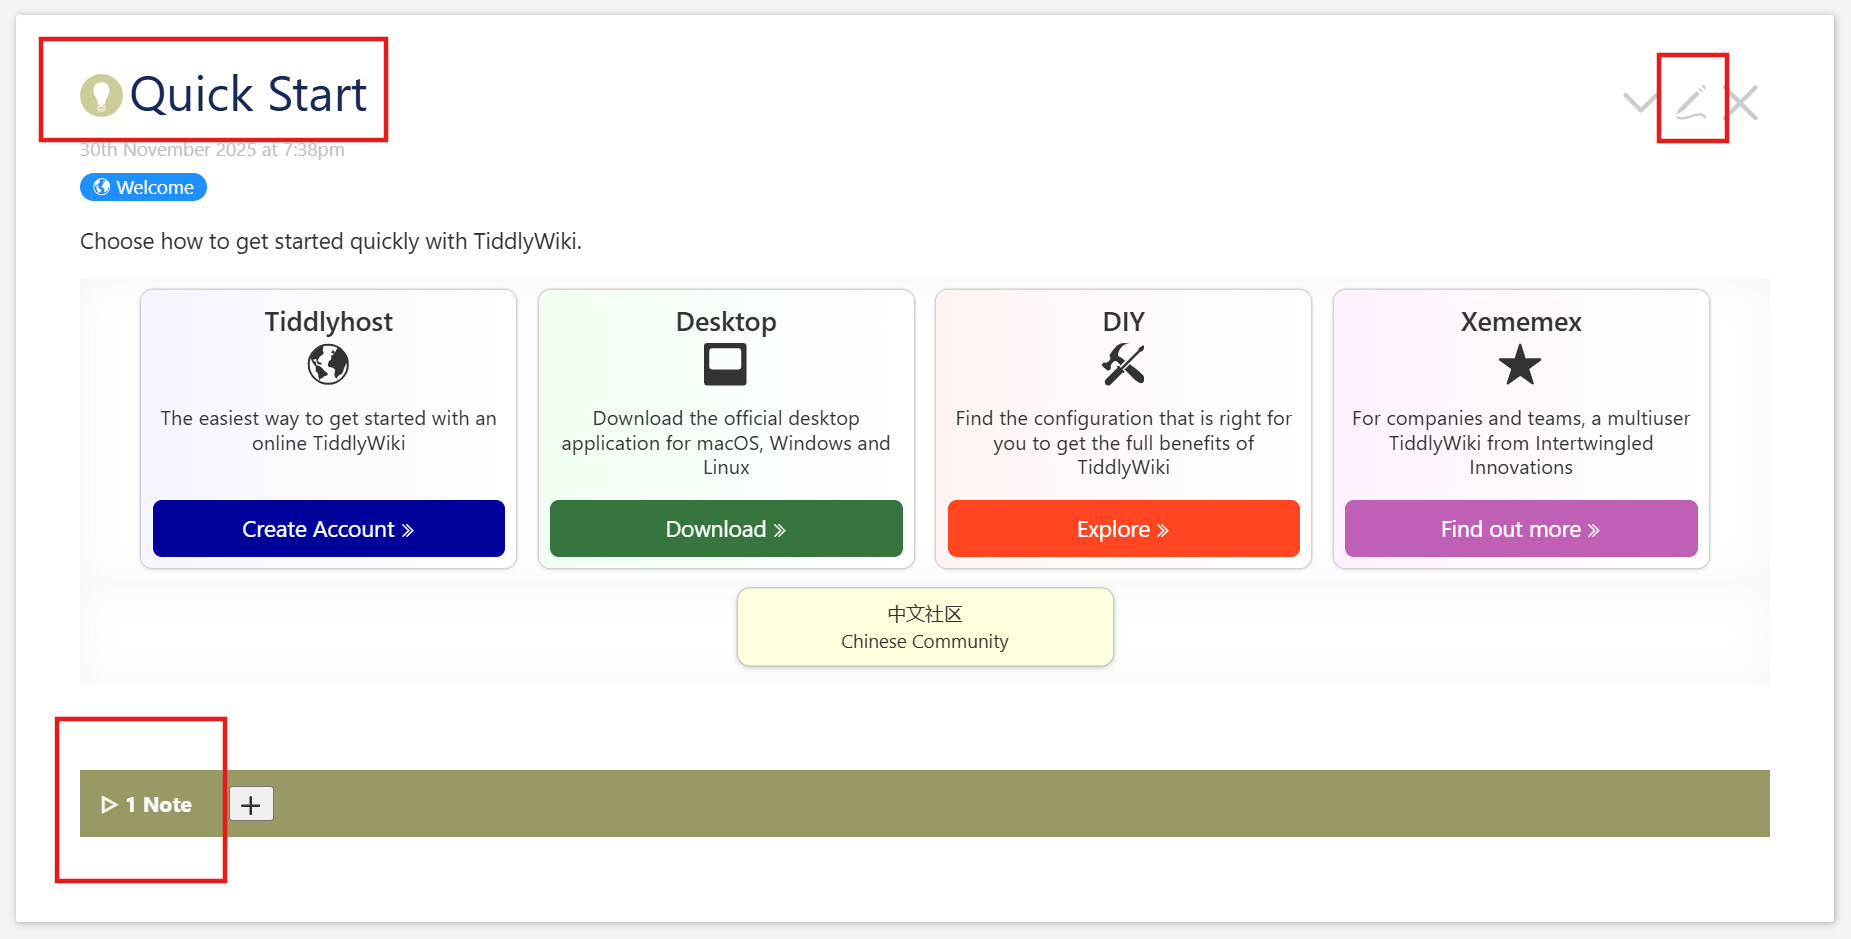
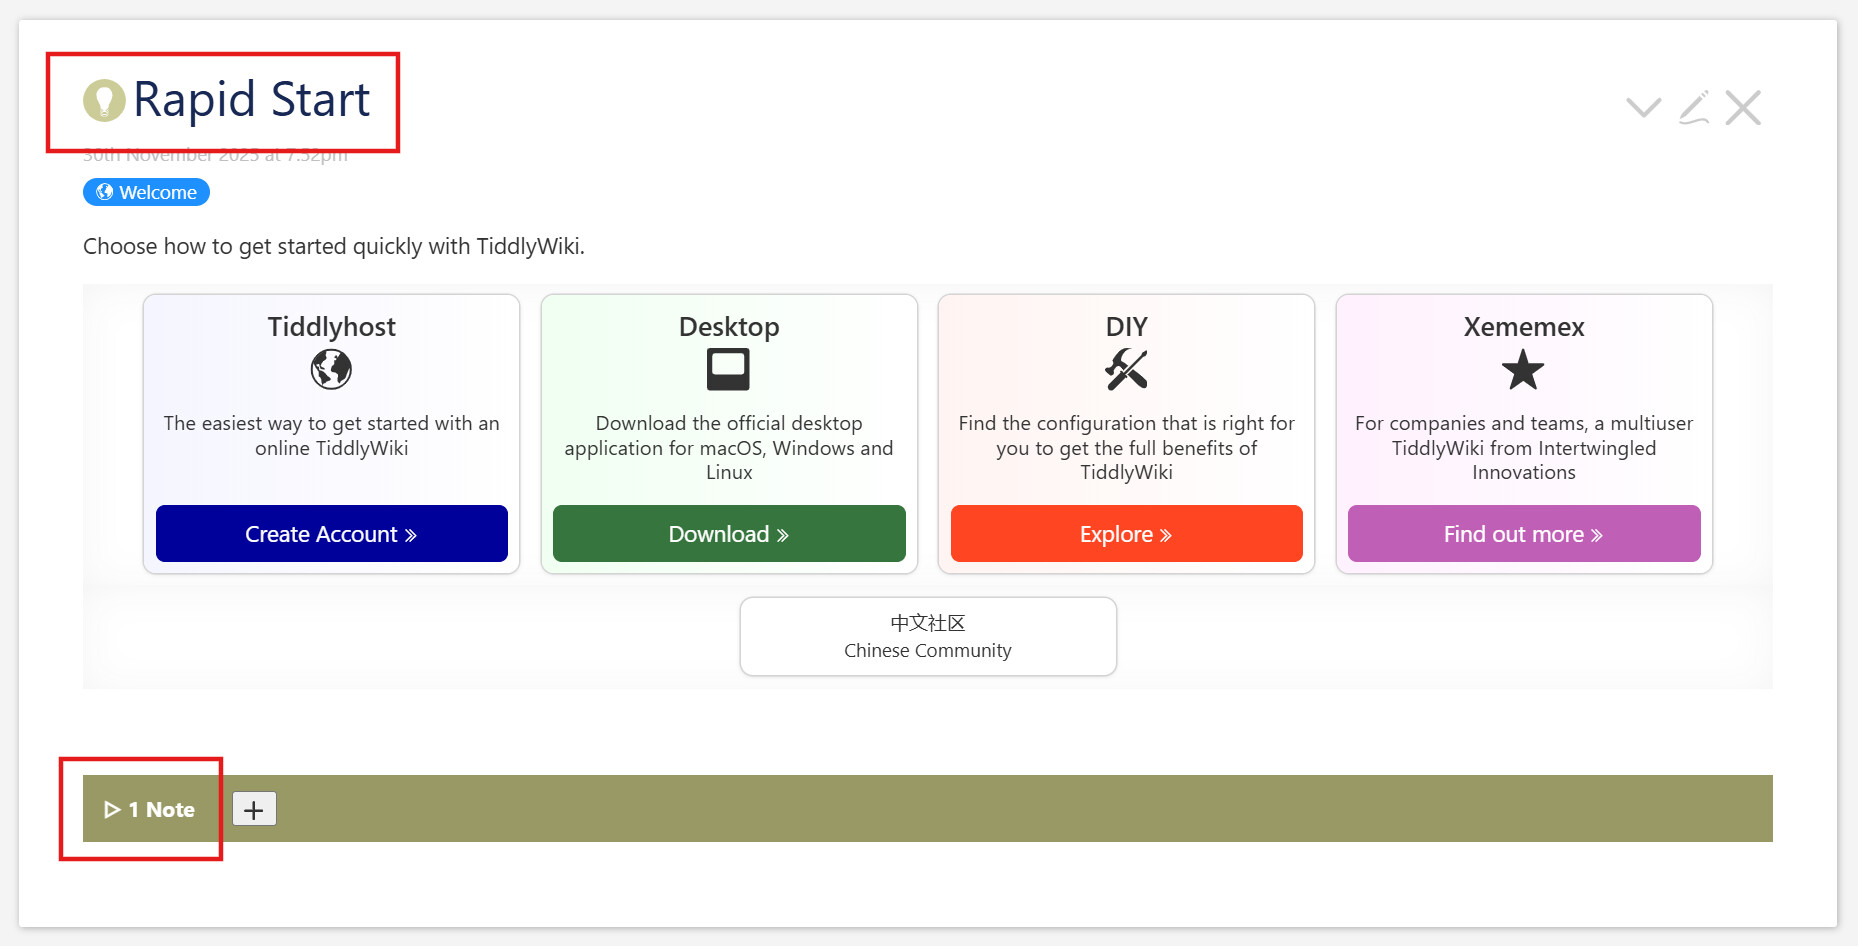
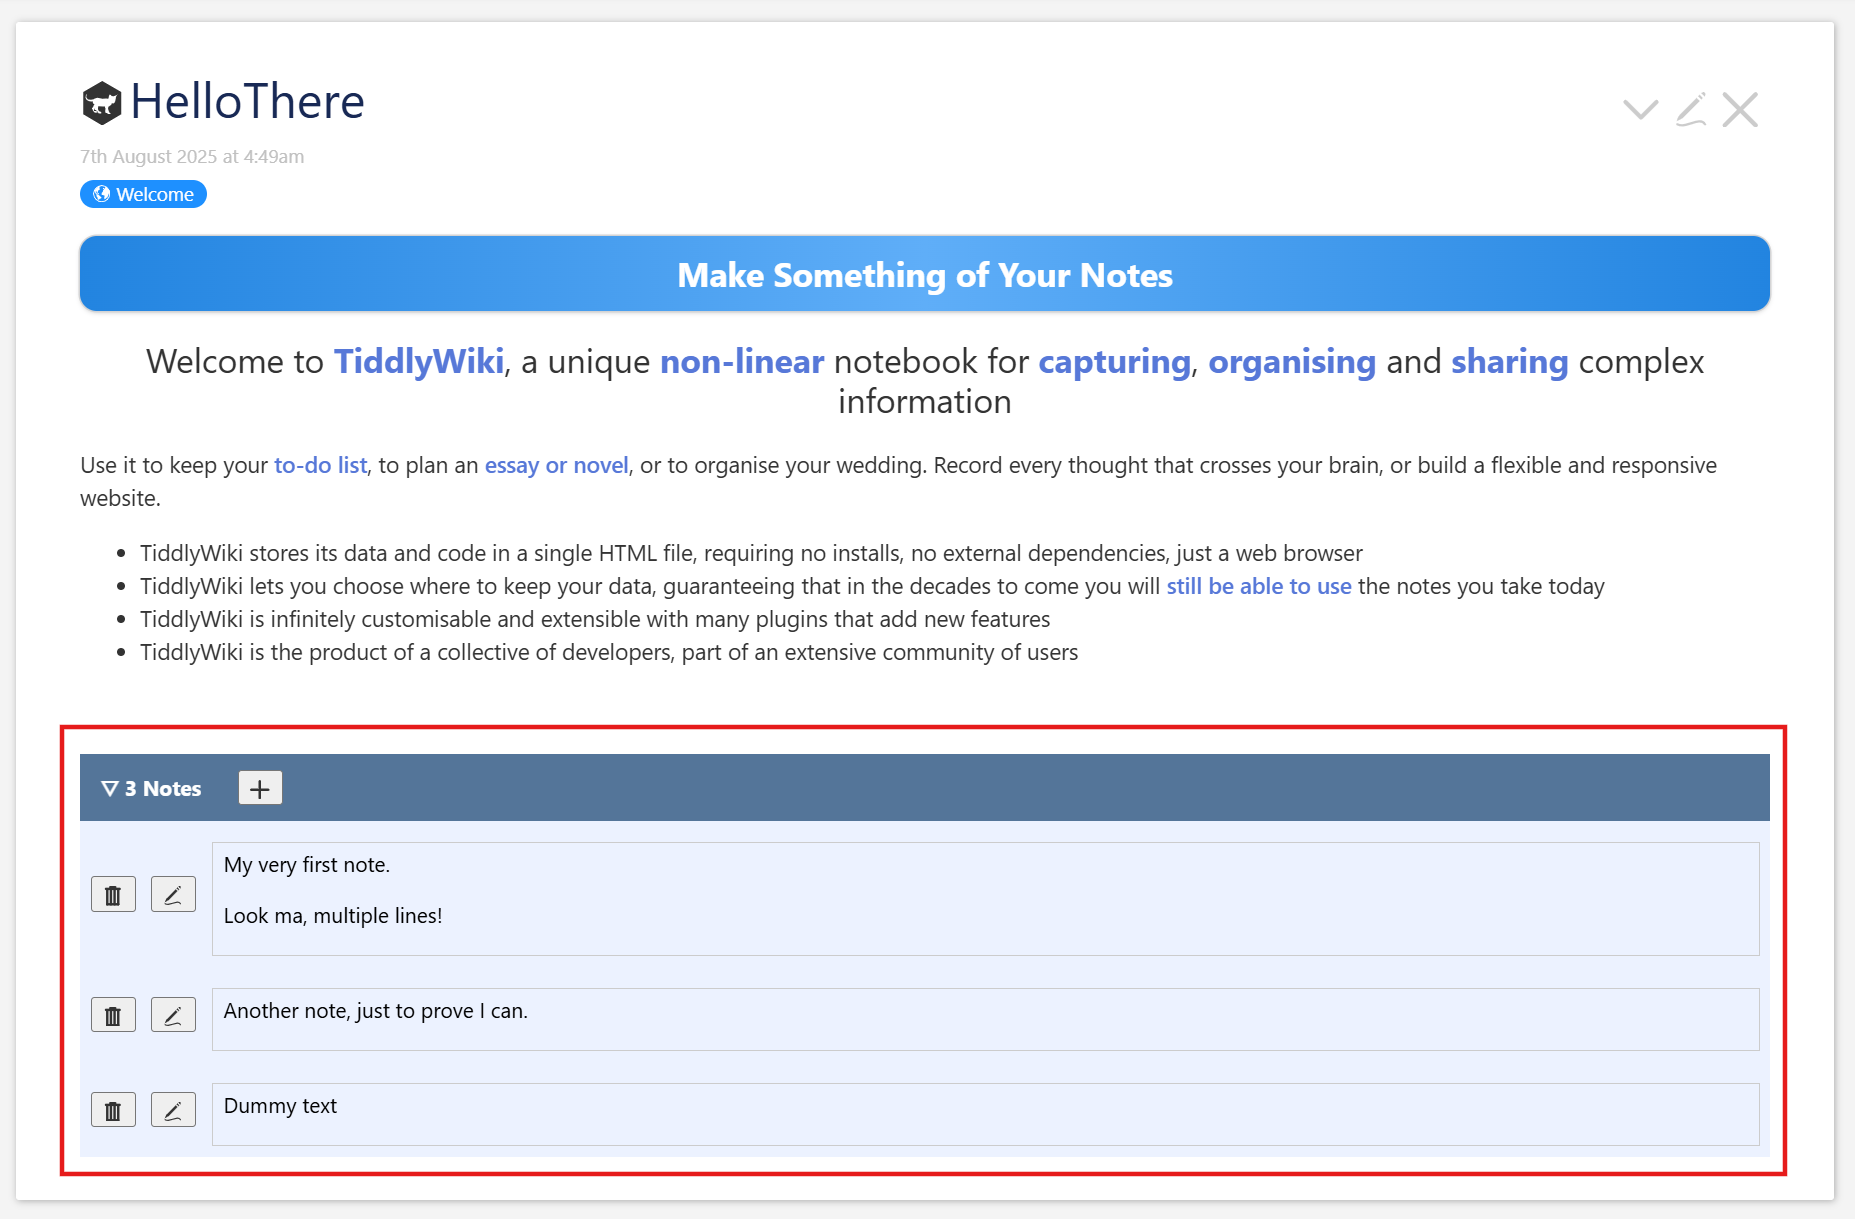
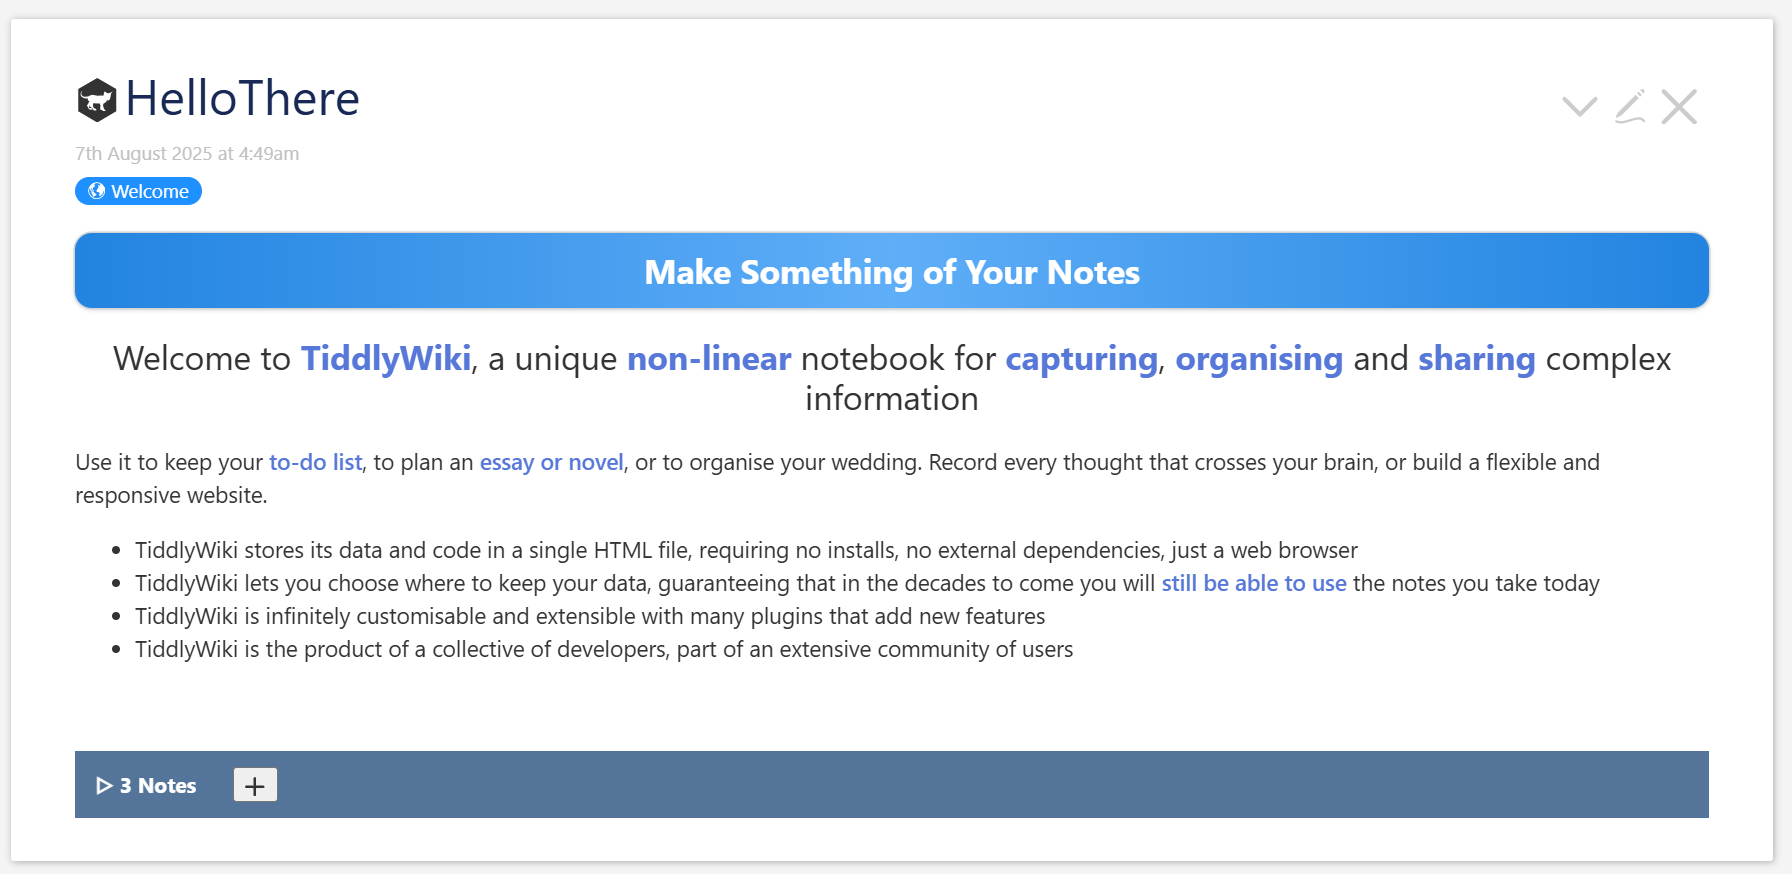
We store notes for all tiddlers inside a single JSON tiddler.
We demo this on a copy of https://tiddlywiki.com. A tiddler with three notes looks like this when collapsed:
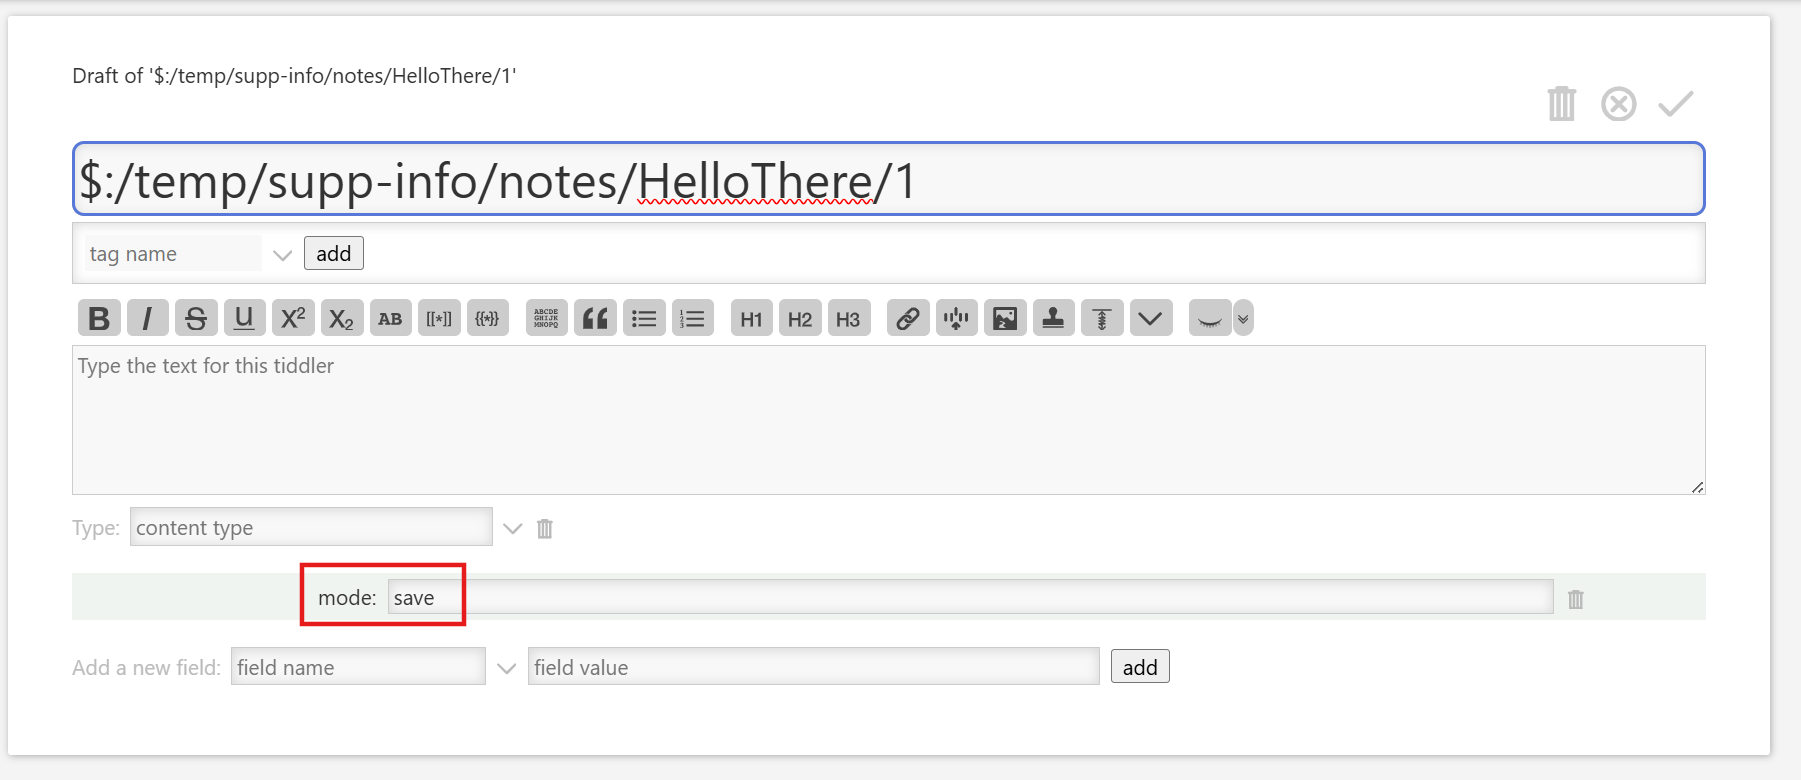
And like this when expanded:
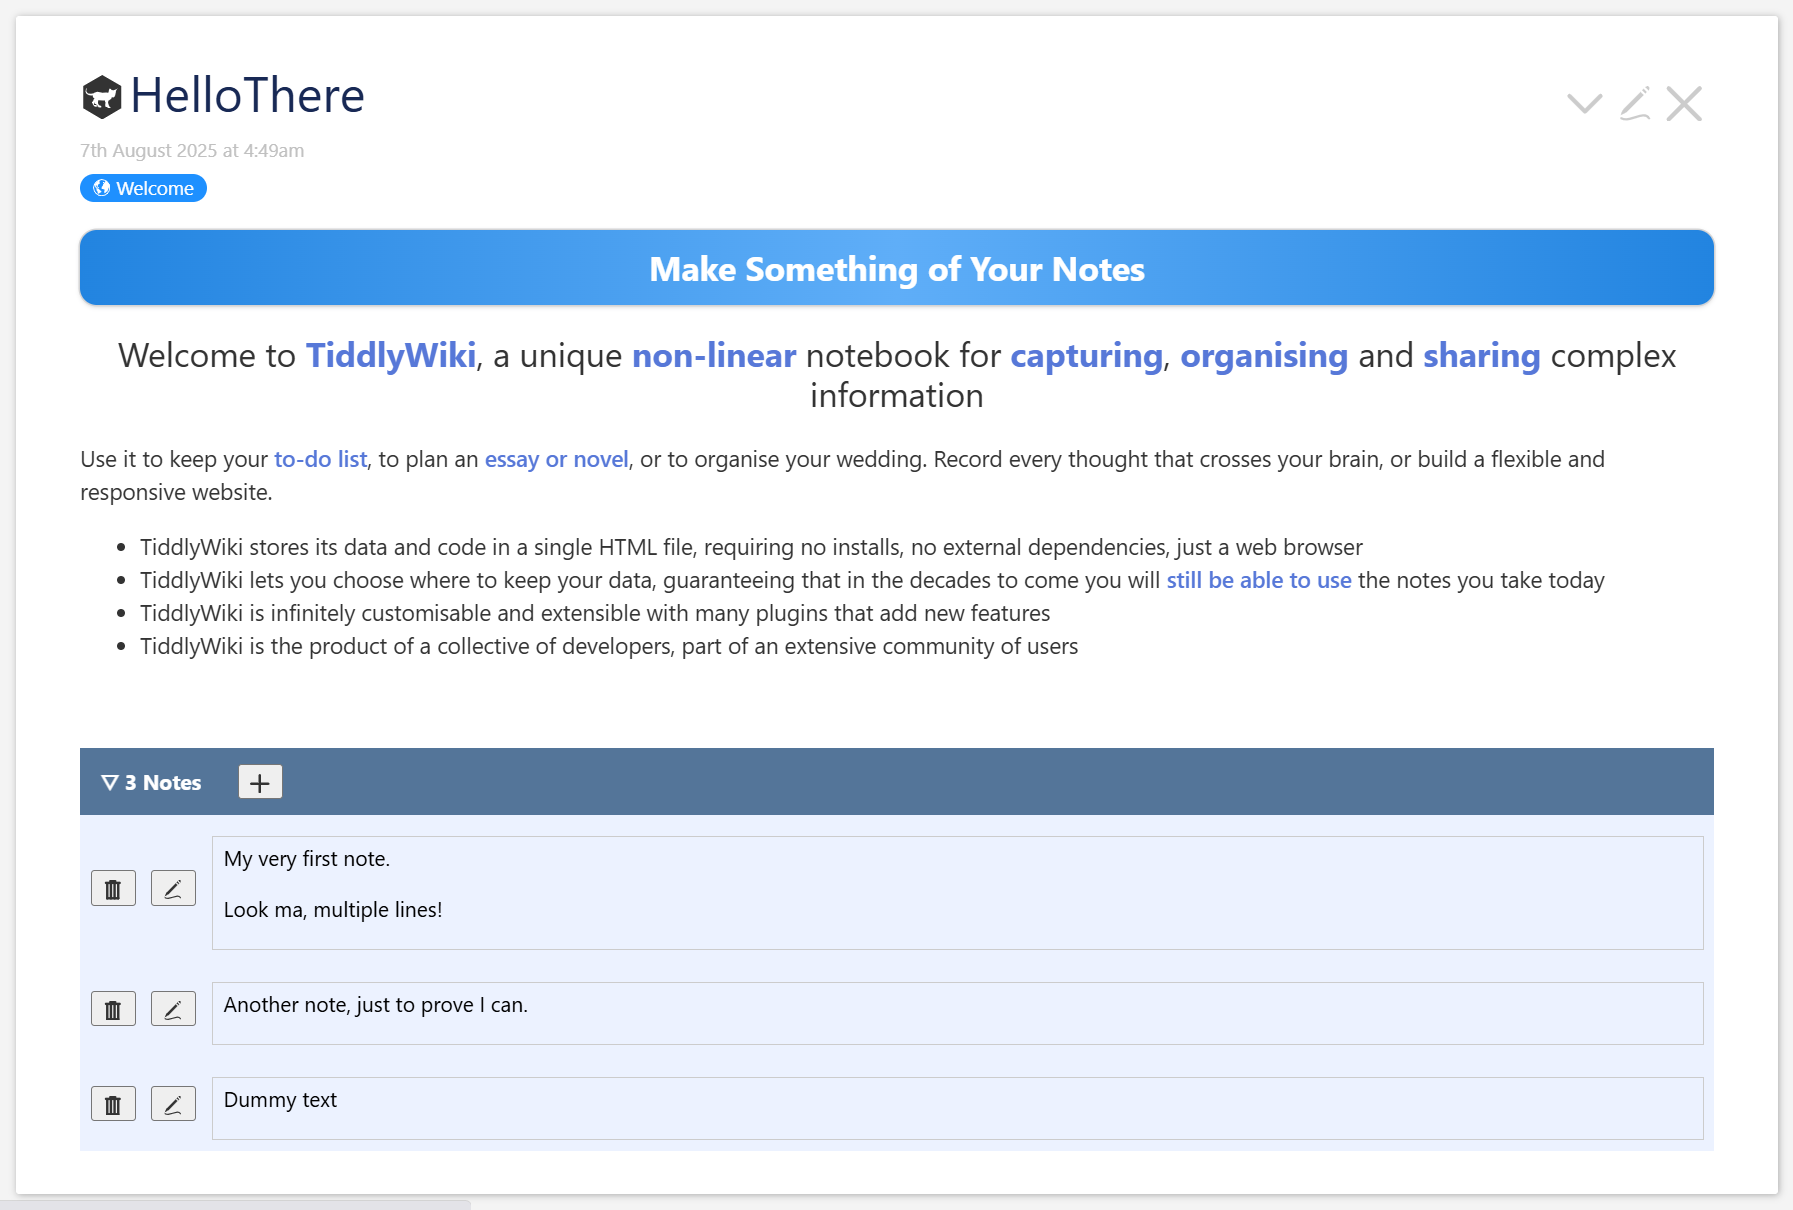
The point here is that this is a single JSON tiddler to store notes for all tiddlers. There are other techniques for doing this sort of external metadata for tiddlers. We won’t discuss them here.
We also won’t discuss here when this is a useful technique. (But if you want to see a long discussion about the usefulness and limitations of JSON tiddlers, #14468 is a recent one.) The current discussion is all about how we might accomplish this.
Testing final version
To try out the final version, you can download the following, then drag it onto tiddlywiki.com (you will have to save a copy and load from that copy, as there are JavaScript modules which need initialization on startup):
SuppNotes_Step11.json (9.4 KB)
Following along
The remainder of this post is a demonstration of the series of steps to build this. It includes a few missteps and steps that are little more than scaffolding for the future.
To follow along, we start by downloading a copy of tiddlywiki.com to our local machine and open it up.
Also, feel free to investigate the GitHub repository with all the works discussed and this post.
Downloading a step
Each step is made by combining one or more of the git commits from the building process. At each step we have a JSON file that we can download and test out. It will look like this:
SuppNotes_Step1.json (697 Bytes)
We download such links, drag the resulting file onto our working wiki, and choose to import. It’s ok to override tiddlers we’ve downloaded earlier. Twice we will need to save and reload in order to test the changes. Once or twice we will need to delete a tiddler or two. Since those deletions are not noted, it doesn’t hurt to every now and then start with a fresh copy of tiddlywiki.com.
Viewing step components
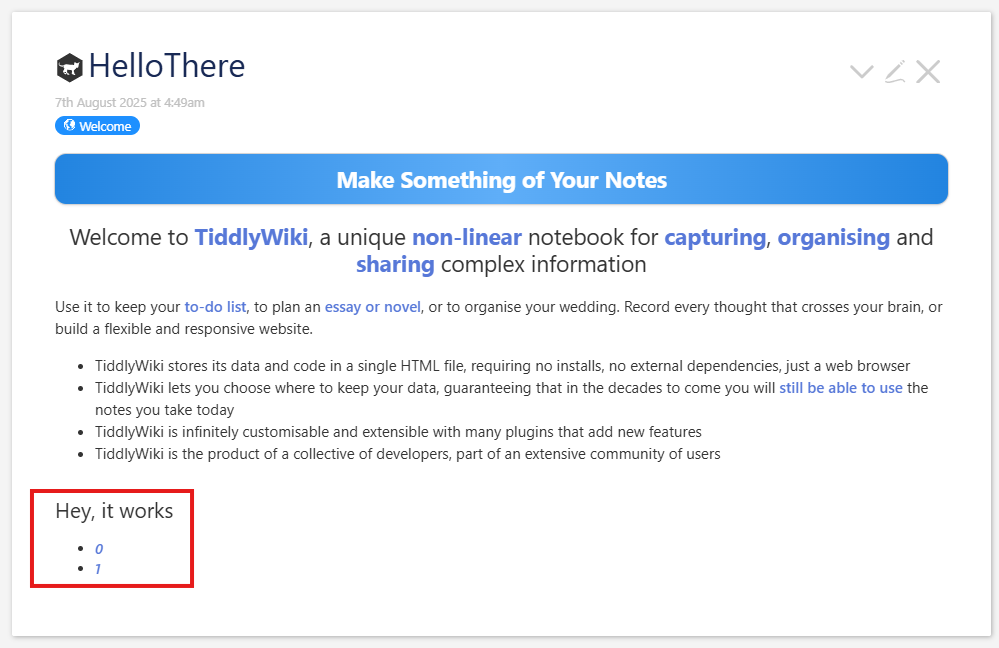
With each step we will also include links to the commits included in the change. It should look something like this.
Aside
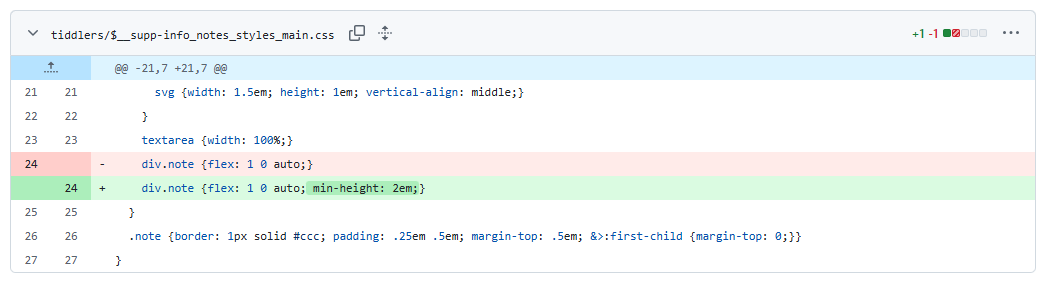
The links take us to the commits in GitHub. If you are not used to reading these, they are displayed as formatted diff files. For instance 70161e4 shows four files being changed. The first and third contain just changes to the
modifiedfield. (This probably means they were accidentally saved, or
changed and changed back.) The fourth shows a handful of modifications,
and the second looks like this:This show the lines that are ignored, the lines that have changed, and a few lines surrounding the changed one. The lines removed are shown in pale red. Those added are shown in pale green. And if the lines are similar enough,the added or removed parts are shown in darker greens and reds.
Debugging
It’s generally difficult to debug wikitext. Here, we often end up using <$action-log message="Note about what's happening" more="info" goes="here"/>. The results of those can be viewed from the developers’ tools console (CTRL/CMD-SHIFT-J.) But we also have a CSS debug class to be added to something we want made prominent – it is simple a red coloring of the element. And half-way through we add a sidebar with our relevant material so we don’t have to scroll all around the page to view and edit the various interesting tiddlers. Most of this debugging information is found in the Git commits in the middle of the steps. If we follow along at the commit level, then we should try to keep the console open to see what’s being logged.
Testing our additional changes
If we want to make changes to the code supplied and test the changes we make, we can export the relevant tiddlers by entering [prefix[$:/supp-info]] on the Filter tab of the $:/AdvancedSearch page and choosing export tiddler > JSON from the more menu. We just have to ensure that our tiddlers begin with that prefix. You can then drag the downloaded file atop a fresh copy of the main page. On later steps, you will also have to save and reload to initialize some JS tiddlers.
 !) that it has entries only for the first two tiddlers in the default view of the